Machines · Creality Falcon

Creality Falcon settings and specs

Creality publishes power and speed tables for most Falcon lasers. Here they are side by side in J/mm, with the specs Creality states, LightBurn setup and the safety notes that do not agree.

  • Settings come from CrealitySeven tables: CR-Laser 10W, A1, A1 Pro, Falcon2 12, 22 and 40 W, and Pro 60W. Creality calls them reference values, so test on scrap.
  • Speed does not follow the wattsThe rows for cutting 3 mm basswood range from 1.71 to 3.27 J/mm by machine. Scale speed by watts and, we suspect, a cut may not finish.
  • Class 1 has limitsThe laser is exposed with the rotary kit (A1C FAQ). T1 conveyor and rotary modes are not Class 1. The open frames are Class 4.
  • LightBurn device filesCreality offers one for the A1, A1 Pro, Falcon2 Pro and A1C. We found none on the Falcon2 40W or CR-Laser 10W pages, and the T1 lists LightBurn in parentheses.

Already own a Falcon? You do not need to buy anything for this page: go straight to the settings.

Affiliate links: the “Search Amazon” buttons open an Amazon.com search, and the AtomStack, Sculpfun and TwoTrees buttons go to those stores through Awin. If you buy, we may earn a commission at no extra cost to you. As an Amazon Associate we earn from qualifying purchases. Links to Creality’s own site are plain source links and earn us nothing. We have not tested any of these machines, and commissions do not change the figures, which are the makers’ own.
Settings

Creality Falcon settings, machine by machine

Pick a material and Creality’s own rows line up by machine. The bar is the energy the laser puts into each millimeter of line. The dot runs at the real speed.

SelectedFalcon A1 Pro 20W
Power100 %
Speed500 mm/min
Passes1
Energy2.40 J/mm

Creality’s sheet gives three bare numbers. We read them as power %, speed and passes (the order its T1 sheet labels) and the speed as mm/min (the unit on its PDF tables). The sheet itself states no unit.

Press a machine to read its row. The dot runs a 100 mm line at the real speed (one pass). J/mm = W × % ÷ 100 × passes ÷ (mm/min ÷ 60).

Speed does not follow the watts

The 3 mm basswood rows for 12 W, 20 W and 22 W all land on 2.40 J/mm. The 40 W row is 2.82 and the 60 W row is 3.27 J/mm. Scale the 22 W row’s 550 mm/min by watts and 60 W should run at 1,500 mm/min, but the table says 1,100, which is 27 % slower. At 5 mm, the 60 W row is 900 mm/min against a calculated 1,091. At 2 and 3 mm the energy broadly rises with watts, but not when the wood gets thicker: at 10 mm the 40 W row (8.00 J/mm) uses less than the 22 W row (11.00), and at 15 mm the 60 W row (14.40) uses less than the 40 W row (16.00). So no single J/mm fits every machine. A setting scaled up by watts may not cut through; that is our inference, and we have not tested it. Creality’s spot grows from 0.08 × 0.1 mm at 22 W to 0.08 × 0.15 mm at 60 W, but it does not give that as the reason. To move a setting between machines, start from the power and speed converter, then confirm it with a material test grid.

04008001,2001,6000 W20 W40 W60 Wmm/minIf speed scaled from 22 W: 1,500A1 · 350A1 Pro · 50012W · 30022W · 55040W · 850Pro 60W · 1,100Creality’s optical power
Creality’s speed for cutting 3 mm basswood in one pass at 100 %. The dots are its tables; the dashed line is our calculation, scaling the 22 W row by watts. This shape is for 3 mm; the 10 mm rows behave differently, as the text explains.

Reading these tables

  • No line interval. None of these tables gives one, so engraving cannot be compared as area energy. Set it with the line interval calculator. The engraving bars show energy per millimeter of line.
  • 40 W and 60 W have modes. The 40 W table is for Normal and the 60 W table for Powerful. For Precise, Creality points to its 22 W table (its store guide gives Precise on the 40 W as 20 W at most).
  • The Falcon2 Pro shares tables. The 22 W and 40 W PDFs cover both the Falcon2 and the Pro.
  • The A1C, Pro S and T1 are not in the chart. We found no table for the A1C or Pro S (the A1C wiki has a test guide). The T1 sheet gives no speed unit.
Lineup

Creality Falcon machines on sale now

Creality’s US store sells these lasers: the enclosed A1C, A1, A1 Pro, Falcon2 Pro and Pro S, the open-frame CR-Laser Falcon and Falcon2, and the T1 galvo with swappable modules. Each card sets the number in the name against the optical power Creality states, with the work area, spot, power draw and laser class, from Creality’s product pages and wiki.

On saleDiode · 10 WIR 1,064 nm · 1.2 W

Falcon A1C 5W / 10W

10W optical
name says 10 W · optical output
Work area
150 × 150 mm
Spot
0.08 × 0.2 mm
Enclosure
EnclosedClass 1 on the store page; Creality’s FAQ still says to wear glasses
Power draw
not stated

Includes Autofocus, objects up to 148 mm tall, 15,000 mm/min, flame and tilt detection, USB safety key, Wi-Fi app. Sold with or without a camera. The 1.2 W IR module is optional.

Note

Creality’s pages disagree. Its wiki FAQ gives the blue module as 445 ± 15 nm and a 1.2 W IR module with a 0.05 × 0.05 mm spot; the store page’s FAQ gives 455 ± 5 nm and a 2 W IR module with a 0.03 × 0.03 mm spot, while its spec table says 1.2 W. So we leave the blue wavelength blank: choose glasses whose band covers both. Both FAQs give about 0.08 × 0.20 mm for the blue spot. Adapter 24 V 3 A for the 5 W module, 24 V 5 A for the 10 W and IR. No power draw is stated.

On saleDiode 455 nm · 10 W

Falcon A1 10W

10W optical
name says 10 W · optical, beams combined
Work area
381 × 305 mm
Spot
0.06 × 0.08 mm
Enclosure
EnclosedClass 1 (FDA)
Power draw
120 W

Includes Pre-assembled, CoreXY up to 600 mm/s, HD camera for preview and placement, air assist set, lid-open stop, emergency stop.

Note

“Dual laser” on the A1 means two blue beams combined into one spot (Creality blog), not a second wavelength. Regional Creality stores give different cut figures, so we leave cut claims out. Creality’s sheet cuts 5 mm basswood in one pass at 100 % and 150 mm/min.

On saleDiode 455 nm · 20 WIR 1,064 nm · 2 W

Falcon A1 Pro 20W

20W optical
name says 20 W · optical output
Work area
358 × 268 mm
Spot
0.08 × 0.1 mm
Enclosure
EnclosedClass 1 (FDA)
Power draw
not stated

Includes Touch screen and app, AI camera autofocus, CoreXY up to 600 mm/s, built-in air assist, flame and tilt stops. The 2 W IR module (spot 0.03 mm) is sold separately or in bundles.

Maker’s cut claim 10 mm basswood and 8 mm black acrylic in one pass on the spec table. Creality’s settings sheet gives 10 mm basswood in 2 passes

Note

The output is DC 24 V 7.5 A, which is where the “180W” in some store listings comes from. The optical power is 20 W. The diode spot comes from a search extract of Creality’s page.

On saleDiode 455 nm · 5 W

CR-Laser Falcon 5W

5W optical
name says 5 W · optical output
Work area
400 × 415 mm
Spot
0.06 × 0.06 mm
Enclosure
Open frameClass 4 (FDA)
Power draw
not stated

Maker’s cut claim 3 mm basswood in one pass (spec table)

On saleDiode 455 nm · 10 W

CR-Laser Falcon 10W

10W optical
name says 10 W · optical output
Work area
400 × 415 mm
Spot
0.06 × 0.08 mm
Enclosure
Open frameClass 4 (FDA)
Power draw
not stated

Includes Up to 10,000 mm/min. The Falcon Pro 10W on the same spec table adds air assist.

Maker’s cut claim 6 mm basswood in one pass on the spec table; the description on the same page says 12 mm wood

Note

Creality’s PDF for this machine stops at 8 mm basswood in 3 passes (100 %, 230 mm/min). The adapter is DC 24 V 3 A; no power draw is stated.

On saleDiode 455 nm · 22 W

Falcon2 22W

22W optical
name says 22 W · optical, beams combined
Work area
400 × 415 mm
Spot
0.08 × 0.1 mm
Enclosure
Open frameClass 4 (FDA Class IV)
Power draw
120 W

Includes Air assist in the box, 25,000 mm/min, TF card for offline jobs, tilt stop.

Maker’s cut claim 10 mm basswood in one pass at 100 %, 120 mm/min; black acrylic 4.6 mm in one pass, 7.6 mm in two (Creality’s table)

Note

22 W optical from four 6 W diodes combined. 120 W is the maximum machine power.

On saleDiode 455 nm · 40 W

Falcon2 40W

40W optical
name says 40 W · optical, beams combined
Work area
400 × 415 mm
Spot
not stated
Enclosure
Open frameClass 4 (FDA Class IV, Falcon2 manual)
Power draw
240 W

Includes 25,000 mm/min, TF card and Type-C. Hold the Reset button for 2 seconds after power-on to switch between Normal (40 W) and Precise.

Maker’s cut claim 15 mm basswood in one pass at 100 %, 150 mm/min; black acrylic 4.6 mm in one pass, 7.6 mm in two (Creality’s table)

Note

The spot is 0.08 × 0.12 mm in the parameter guide but “0.1mm/0.15mm” on the product page, so we leave it blank. Weight is 7.4 kg and 7.68 kg on the same page. 40 W comes from eight diodes combined.

On saleDiode 455 nm · 22 W

Falcon2 Pro 22W

22W optical
name says 22 W · optical output
Work area
400 × 415 mm
Spot
0.08 × 0.1 mm
Enclosure
EnclosedClass 1 (FDA)
Power draw
120 W

Includes Top camera, sensors for airflow, lens and flame. Same settings table as the Falcon2 22W. A 22 W + 2 W IR version is a separate model: IR cannot be added later.

On saleDiode 455 nm · 40 WDiode · 1.6 W

Falcon2 Pro 40W

40W optical
name says 40 W · optical output
Work area
400 × 415 mm
Spot
0.08 × 0.12 mm
Enclosure
EnclosedClass 1 (FDA)
Power draw
240 W

Includes Comes with a 1.6 W module for fine detail. Same settings table as the Falcon2 40W. A 40 W + 2 W IR version is a separate model.

On saleDiode 455 nm · 60 WDiode · 1.6 W

Falcon2 Pro 60W

60W optical
name says 60 W · optical output
Work area
400 × 400 mm
Spot
0.08 × 0.15 mm
Enclosure
EnclosedClass 1 (FDA). See the light-leak note below
Power draw
360 W

Includes Powerful (60 W), Normal (40 W) and Precise modes on one module, plus a 1.6 W module for fine detail. A 60 W + 4 W IR version is a separate model.

Maker’s cut claim “22mm basswood” in one pass in the description; Creality’s table goes to 15 mm at 100 %, 250 mm/min

On saleDiode · 40 W

Falcon2 Pro S 40W

40W optical
name says 40 W · optical output
Work area
355 × 390 mm
Spot
not stated
Enclosure
EnclosedFDA Class 1
Power draw
not stated
Note

The page text gives 40 W optical and 355 × 390 mm, and no wavelength, spot or power draw. We found no settings table. The Pro S 22W showed every version as sold out on 2026-11-04.

On saleDiode 445 nm · 20 W

Falcon T1 (galvo)

20W optical
name says 20 W · optical output
Work area
175 × 175 mm
Spot
0.12 × 0.14 mm
Enclosure
EnclosedClass 1 with the lid closed; not in conveyor or rotary modes
Power draw
not stated

Includes Galvo up to 10,000 mm/s. Swappable modules: 20 W or 40 W diode, 20 W fiber, 60 W MOPA, 5 W UV. Shown with the 20 W diode.

Note

Spots: 0.14 × 0.18 mm on the 40 W diode, 0.05 mm on fiber and MOPA, 0.014 mm on UV. UV internal engraving is 70 × 70 mm. Creality’s T1 settings sheet states no speed unit, so it is not in our chart.

Size

Work areas to scale

All beds are drawn from the same top-left corner at the same scale. The dashed outlines are a US Letter sheet and a 12 × 12 in board.

LightBurn

Creality Falcon LightBurn settings

Creality offers device files for the A1, A1 Pro, Falcon2 Pro and A1C, and those are the safe place to start. The A1 Pro file uses GRBL-LPC; the A1 and Falcon2 Pro files use GRBL. Only the open-frame Falcon2 is unsettled: a forum thread asking GRBL or GRBL-LPC ends without an answer.

  1. Import the device fileGet the .lbdev from the Download section of the A1, A1 Pro or Falcon2 Pro product page, or the A1C wiki guide. Then Devices, Import. For the open-frame Falcon2, one forum thread reports a file on the drive in the box.
  2. Choose the COM portIf it will not connect, check the CH340 driver and that the Type-C cable carries data (A1C guide).
  3. Check $30 and $32Type $$ in the Console. $30 should match S-Value Max, and Laser Mode ($32) should be 1 (LightBurn docs).
  4. Enter the table valuesUse the power % and mm/min as written. If LightBurn is set to mm/s, divide by 60.
  5. Set the airWeak for engraving, strong for cutting (Falcon2 FAQ).
  6. Test small and stay closeRun a small shape on scrap. Even with flame detection, a person keeps watch for fire.
MachineWhat Creality says about LightBurnDevice fileConnection
Falcon A1CConnection guideYes (wiki guide)Type-C data cable, COM port
Falcon A1Named in the spec table and FAQ, with LaserGRBLGRBL, serial, 381 × 305 mm (product page, Download)Type-A to Type-C cable in the box, serial
Falcon A1 ProNamed in the spec table; LightBurn has a camera presetGRBL-LPC, serial, 358 × 268 mm (product page, Download)Type-A to Type-C cable in the box, serial
Falcon2 Pro 22/40WNamed in the spec tableGRBL, serial, 400 × 415 mm (product page, Download)Serial (device file)
Falcon2 Pro 60WNamed in the spec tableGRBL, serial, 400 × 400 mm (product page, Download)Serial (device file)
Falcon2 12/22/40WNamed in the FAQ and manual; TF-card G-code is made in LightBurnNone found on the product pages; one forum thread reports a file on the drive in the boxType-C, TF card
CR-Laser FalconNamed in the spec tableNone found on the product pagesNot stated
Falcon2 Pro SNot named in the page text we could readNone found (not confirmed)Not stated
Falcon T1Written as “Falcon Design Space, (LightBurn)”, in parentheses, with no license or stepsNot listedNot stated

LightBurn licenses, prices and other software are in the LightBurn compatibility checker, and you can paste your $$ output into the GRBL settings checker. LightBurn is paid, with a 30-day trial; LaserGRBL and Falcon Design Space are free.

Rotary, honeycomb and air

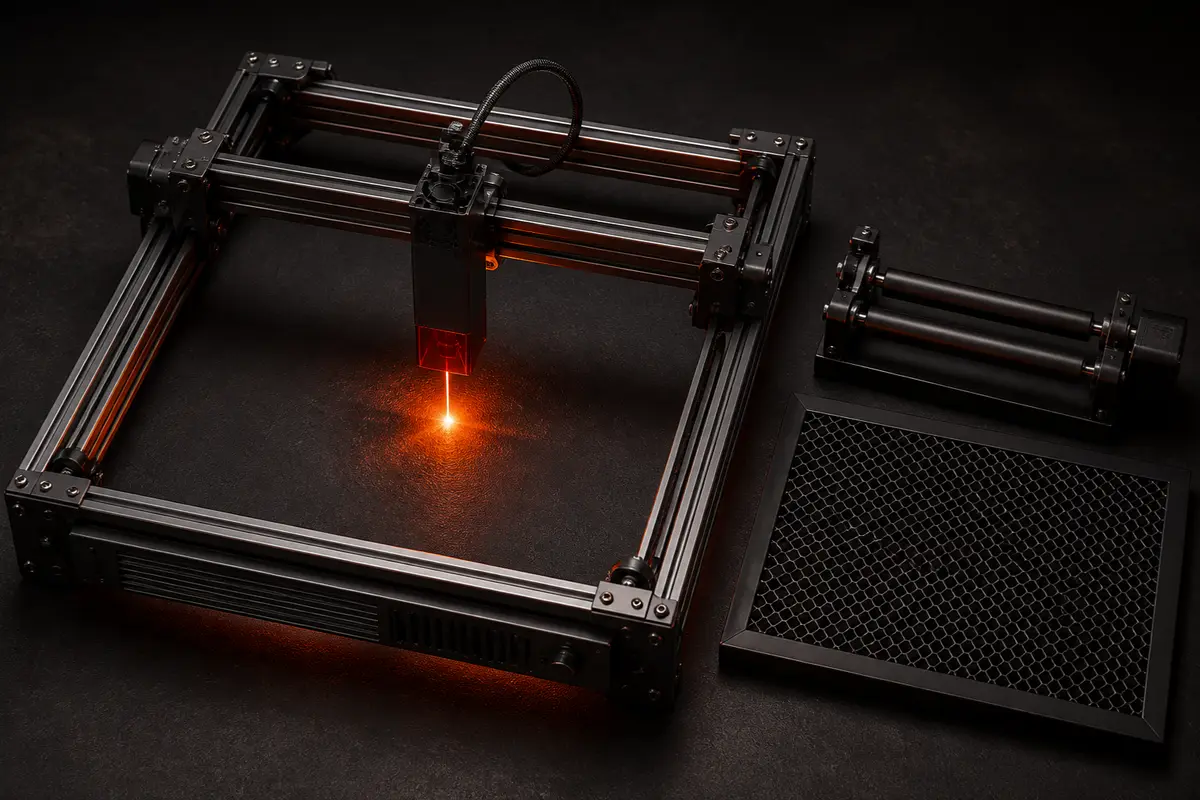
An aluminum open-frame diode laser seen from above, with a rotary roller and a honeycomb panel beside it
An open-frame set-up: the frame, a rotary roller and a honeycomb panel.
  • Rotary. Creality sells rollers and chucks by model. Even on enclosed machines, it warns of light leakage when the bottom tray is removed or the machine is raised. Work out the steps with the rotary calculator.
  • Honeycomb. Creality says to keep the underside of a cut suspended and to protect the bench. It recommends the 500 mm size for the Pro series and sells a 460 × 346 mm panel for the A1.
  • Air. The A1, A1 Pro, Falcon2 and Pro come with air assist (Creality’s pages and compatibility table). Flow and pressure are covered in the air assist guide.

What to check before you buy

  1. “Class 1” has limits, and Creality’s own pages disagree on glasses. The A1 page says no goggles are needed. The A1C FAQ says laser safety glasses must be worn, because the laser is exposed when you use the rotary kit. The T1 page says conveyor and rotary modes are not Class 1. Creality’s compatibility table warns of light leakage when you remove the bottom tray or raise the machine. Follow the stricter rule, and match goggles to the wavelength with our safety glasses checker.
  2. One review saw light leaking from the Pro 60W. Tom’s Hardware reports light from an unfilled cable hole and a faint blue glow through the side panels during full-power cutting, on very thin acrylic. A reader who owns one replied that they have not seen it. We have not tested it. If people are near the machine, plan for it.
  3. The open frames are Class 4, whatever a listing title says. Creality’s pages list the CR-Laser Falcon as Class 4, and the Falcon2 manual says Class IV. One store listing title we saw for the Falcon2 ends in “Class 1”. The Falcon2 FAQ describes a light-blocking design on the module and still recommends goggles. A module shield is not an enclosure: nothing encloses the whole machine, so wear safety glasses.
  4. “180W” and “72000mW” in a listing are electrical. The A1 Pro’s spec sheet gives DC 24 V 7.5 A, which is 180 W, and 20 W of light. The CR-Laser’s DC 24 V 3 A is 72 W, and 10 W of light. Compare machines by optical power, not by the adapter.
  5. Cut claims run ahead of the settings tables. The Pro 60W text says 22 mm basswood in one pass; its table stops at 15 mm. The A1 Pro spec table says 10 mm in one pass; its sheet uses 2 passes. The CR-Laser 10W text says 12 mm; its spec table says 6 mm. Plan from the tables, and see how thick a laser can really cut.

To move a setting between machines, use the power & speed converter; to compare optical power with other brands, see the real laser power table.

Falcon alternatives to compare

Machines close in power, grouped by enclosure, with each bed drawn to the same small scale. The last group is sorted by the number in the name, and its beds differ widely. The figures are each maker’s own, and we have not tested any of them. We cannot say one is better, so choose by enclosure, bed size and power.

Small and enclosed

Sculpfun iCube Ultra12 W · 150 × 135 mm · EnclosedSculpfun ↗
AtomStack P1 / P1 Dual5 W · 110 × 110 mm · EnclosedAtomStack ↗

Enclosed, about 10 W

Sculpfun E1 / E1 Dual12 W · 400 × 320 mm · EnclosedSculpfun ↗

Enclosed, about 20 W

Sculpfun E1 Pro / E1 Pro Dual21 W · 400 × 320 mm · EnclosedSculpfun ↗

Open frame, about 20 W

TwoTrees TTS-20 Pro20 W · 418 × 418 mm · Open frameTwoTrees ↗

Open frame, 40 W and up

TwoTrees TS2-40W40 W · 450 × 410 mm · Open frameTwoTrees ↗
AtomStack A40 Pro V248 W · 385 × 400 mm · Open frameAtomStack ↗

The biggest number in the name

AtomStack A70 Max70 W · 850 × 800 mm · Open frameAtomStack ↗
Sculpfun S70 Max70 W (name) · 830 × 800 mm · Open frameSculpfun ↗
Affiliate links: the store buttons go through Awin. We may earn a commission at no extra cost to you. We have not tested these machines.

To compare optical power across brands, see real laser power. For wavelengths, see diode vs CO2 vs fiber. Check goggles with the safety glasses checker, and cut limits in how thick a laser can cut. Size your exhaust with the exhaust fan calculator.

Rotary rollers and honeycomb beds are in the section above. Before you buy glasses, check the wavelength and OD with our safety glasses checker.

FAQ

What settings should I use on a Creality Falcon 10W?
From Creality’s CR-Laser Falcon 10W table: engrave basswood at 40 % and 3,000 mm/min; cut 2 mm basswood at 100 % and 350 mm/min, 5 mm at 150 mm/min, and 8 mm at 230 mm/min in 3 passes. The Falcon A1 10W sheet gives the same basswood rows at 2, 4 and 5 mm. Creality calls these reference values, so test on scrap first.
What are the LightBurn settings for a Creality Falcon?
Creality offers LightBurn device files for the A1, A1 Pro and Falcon2 Pro on their product pages, and for the A1C in its wiki guide: Devices, Import, pick the file, choose the COM port. The A1 and Falcon2 Pro files are set to GRBL and the A1 Pro file to GRBL-LPC, all over serial. For the open-frame Falcon2, one forum thread reports a file on the drive in the box. Then use Creality’s power and speed rows, and check that $30 matches S-Value Max and that $32 is 1. For air, Creality says weak when engraving and strong when cutting.
What is the difference between the Falcon2 Pro 22W, 40W and 60W?
Optical power is 22 W, 40 W + 1.6 W and 60 W + 1.6 W, with spots of 0.08 × 0.1, 0.08 × 0.12 and 0.08 × 0.15 mm and maximum machine power of 120, 240 and 360 W. The 22 W and 40 W have a 400 × 415 mm bed; the 60 W has 400 × 400 mm. Creality’s tables cut basswood to 10, 15 and 15 mm in one pass.
Do I need safety glasses with a Class 1 Falcon A1 or A1 Pro?
Creality’s pages disagree. The A1 page says no goggles are needed with the lid closed; the A1C FAQ says glasses must be worn, because the laser is exposed with the rotary kit. Treat the enclosure as protection only when it is closed and intact. With a rotary, a removed tray or a raised machine, wear glasses rated for your wavelength.

Sources

Checked 2026-11-04 · We have not tested any of these machines. Every figure on this page is what the maker states, linked to the maker page.