Laser engraver troubleshooter
Pick what your laser did, answer two or three questions, and see the likely cause and where to look on the machine. Causes come from maker and LightBurn documents. Free checks come first; parts come only when those run out.
The short answer: before you buy anything, check the belts, lens, focus and settings. None of those checks costs money, and a new laser module should be the last idea, not the first. If you already know which part has failed, these go straight to it.
 What is your laser doing?
1What did the laser do?
2Answer these
3Likely cause
The X axis: belt, rail or head carriage
Answer the question above to see the likely cause.
The X axis: belt, rail or head carriage
When “X-axis lines” wave, xTool lists the X belt tension, a deformed, blocked or worn X rail, a loose head plate and damaged bearings. xTool does not define which way those lines run. Reading them as lines drawn by the X axis is our assumption, so if working on this axis does not cure it, check the other one too. Sculpfun adds the carriage wheel, which should just touch the frame.
Look hereX beltCarriage wheelsRails
- Power off and unplug. Pluck the X belt: LightBurn says it should be taut but not overtightened, and pluck like a guitar string. Creality’s check is to press it midway: it should give slightly, not hang loose.
- Gently rock the head carriage from side to side. If it moves, Sculpfun raises the lower wheel with the eccentric nut, a quarter turn at a time, and stops as soon as the play is gone.
- Wipe the rail and wheels and clear anything stuck on them. xTool then looks for rust and wear, and greases the rail.
- Frayed, cracked or missing teeth: replace the belt (Creality).
- A bent rail or damaged bearings: xTool replaces the rail and sends bearing questions to its support.
Related toolsGrbl $$ checker
The Y axis: belts, rails or drive shaft
When “Y-axis lines” wave, xTool lists the Y belt tension, deformed, blocked or worn Y rails, and a deformed drive shaft or loose coupling. xTool does not define which way those lines run. Reading them as lines drawn by the Y axis is our assumption, so if working on this axis does not cure it, check the other one too.
Look hereY beltsRailsPulleys
- Power off and unplug. Check the belts on both sides of the machine: same tension, none hanging loose.
- Wipe the Y rails. Look for rust and wear. Grease them if your manual allows it (xTool does; Creality says a thin layer, wiped back).
- On a shaft-driven machine, check the coupling is tight and both shaft ends are fully seated (xTool). On any machine, check the small grub screws on the pulleys (Sculpfun).
- Visible belt damage: replace the belt. Creality says not to keep running a belt that slips.
- A bent drive shaft or deformed rail: ask the maker about a replacement (xTool).
Related toolsGrbl $$ checker
Too fast or too hard for this frame
LightBurn says quality is not always preserved near a machine’s theoretical top speed, and ties line wobble to high Y acceleration. The Grbl wiki says a grinding sound means the motors are losing steps.
Look hereSoftwareLaser head
- Run the same job at half the speed and stay with it: half the speed doubles the energy per millimeter, so it burns darker and can flare. Halve the power too to keep the energy about the same. If the lines come out straight, speed is the cause.
- Lower the acceleration a little: $120 and $121 on Grbl. Sculpfun’s guide suggests 250 mm/s² for its machines. Other makers differ, so note your values first.
- If you are tuning limits, do it with the laser off, using G0 moves. The Grbl wiki’s method: raise the value until the motor stalls, then set it 10–20 % below that.
Related toolsGrbl $$ checkerPower and speed converter
Nothing to buy for this one.
Something is loose
LightBurn blames wobbly engraves on inertia finding play in the mechanics. Besides belts and rails it names unsecured lenses, mirrors, toolheads, axes and frames. Sculpfun says many users found pulleys not tightened enough on the motor shafts.
Look hereLaser headPulleysFrame
- Power off and unplug, then do LightBurn’s wiggle test: gently move each part by hand and tighten whatever moves.
- Check the head: is the laser module firm on its plate? Is the lens or nozzle loose?
- Tighten the pulley grub screws and center each belt on its pulley. Sculpfun says a belt rubbing the pulley edge adds friction.
- Only if a belt or wheel is actually worn: replace that part.
Related toolsGrbl $$ checker
The table is moving, not the laser
If nothing on the machine is loose, LightBurn says inertia may be carrying into the table or moving your material.
Look hereTableBed and material
- LightBurn’s test: put the laser on the floor if you can, and run the job again.
- If that cures it, stiffen the table with cross-bracing or a backer board.
- Make sure the material cannot shift: tape or pin it down.
Nothing to buy for this one.
Square is not square: frame or lost steps
For gantry machines where both lines and fills lean, LightBurn lists a misaligned frame or mirrors, motors losing steps (for example from overheating) and other mechanical issues.
Look hereFrameY beltsMirrors
- Sculpfun’s frame check: with the power off, move the gantry fully to the front and back. Both ends should reach the frame at the same time.
- Measure the diagonals of a burned square. If they differ, the axes are not at right angles (plain geometry).
- Motors hot to the touch after a long job? Let them cool and lower the speed.
- Ruida machine and only the fill leans: LightBurn points to the “PWM Rising Edge Valid” vendor setting. Galvo: run Lens Correction.
Related toolsGrbl $$ checker
Scan lines out of step: scanning offset
LightBurn: power supplies, tubes and belts respond with a slight delay, which shifts the output and gives “ghosted edges”, more visible at high speed. Thunder Laser says to check these values before you touch the image.
Look hereSoftwareX belt
- First rule out loose belts (LightBurn says slipping looks similar).
- Burn a 50 × 10 mm Fill, 0.5 mm line interval, at several speeds. On G-code machines turn on Overscanning at 5 % or more; Ruida does it automatically.
- Measure the gap between the line ends at each speed, and enter half of it in Device Settings › Scanning Offset Adjustment.
Related toolsLine interval calculator
CO2: the beam may be clipping the nozzle
A summary of Thunder Laser’s help page says double lines in vector work come from the beam reflecting or refracting off the nozzle opening, and that the fix is the beam’s verticality in the head. We could read only a summary of that page.
Look hereMirrorsLensLaser head
- Power off. Clean the mirrors and focus lens with a cotton pad or microfiber cloth and isopropyl alcohol (OMTech).
- Follow your maker’s mirror alignment guide, one mirror at a time. Thunder Laser’s alignment guide squares the gantry first and does not move on until each stage is right.
- Beam tests are done at low power with the lid shut wherever the procedure allows. A CO2 beam is invisible: wear 10,600 nm glasses and keep your hands out of the beam path.
- A lens still dirty, scratched or damaged after cleaning must be replaced (OMTech).
Related toolsSafety glasses checker
The file burns it twice
If the Preview shows it too, the machine is doing what it was told. LightBurn: shapes that overlap on different layers are each engraved in full, and with a filled view, hidden objects behind others still engrave.
Look hereSoftware
- Switch to Wireframe view to reveal hidden graphics, and delete what you do not need.
- Put overlapping shapes on one layer, then check the Preview again.
Nothing to buy for this one.
A dirty or damaged lens
Creality says a dirty lens can reduce power and cause weak cuts. Sculpfun says dirt on the lens heats up in the beam until the lens goes blind or cracks, and calls this the most common cause of declining laser performance.
Look hereLensAir pumpLaser head
- Power off, unplug, let it cool. Look at the lens with a phone camera or a mirror (xTool). Never look up into the head with the machine on.
- Clean it gently: xTool and Sculpfun use a cotton swab with alcohol or isopropanol; Creality says a dust-free cloth and no unknown chemicals. Follow your manual.
- Re-focus and run the same job again (Creality does this before calling a lens bad).
- Lens fouls quickly? Sculpfun says to keep the air pump outside the enclosure, where it breathes clean air.
- Cracked, cloudy, burned or still weak after cleaning: replace the lens (Creality). Lenses are model-specific, so match yours first.
Related toolsFocus ramp testAir assist guide
The work is out of focus across the bed
LightBurn: warped or uneven material moves in and out of focus, and a misaligned beam path or a gantry not parallel to the work does the same. xTool also lists a warped baseplate or material when cuts fail.
Look hereBed and materialFrameMirrors
- Hold the material flat (pins, tape, weights outside the burn area) and try again.
- With the power off, measure the gap from nozzle to work at the four corners. They should match.
- CO2 and weak only on one side? xTool notes a deviated beam path makes performance vary across the area. Clean the mirrors and check alignment.
Related toolsFocus ramp test
A hot or aging laser source: check this last
xTool says continuous high-power use can temporarily reduce output, and that power loss from aging cannot be reversed. Rule out the lens, focus and settings first: those cost nothing, and a new module costs a lot.
Look hereLaser headCO2 tube
- Power off for about 5 minutes, then test again (xTool’s M1 advice). Creality’s ERROR:07 also asks you to clean and cool the module.
- Burn a known job: same material, thickness and default settings as when it last worked. Keep a photo so you can compare.
- Work around it: more power, more passes or lower speed (xTool).
- Still weak: send your test to the maker’s support before buying anything. A module or tube may be under warranty. CO2 owners can use OMTech’s mA test (under “not firing”).
Related toolsReal laser powerMachine list
Nothing to buy for this one.
This job is beyond this laser
xTool says its blue-laser modules cannot cut transparent materials, metal or ceramic. Thickness has limits too: compare yours with the maker’s own figure, and read how that figure was made.
Look hereBed and materialLaser head
- Check the laser type against the material on our matrix.
- Check the thickness against the maker’s cut figure and its conditions, such as passes and air assist.
- Try more passes at a lower speed on scrap, up to what is safe. Stay with the machine: more heat means more risk of flames.
Related toolsDiode vs CO2 vs fiberHow thick can a laser cutWhat not to laser cut
Nothing to buy for this one.
Weak or missing air assist
LightBurn’s manual says air assist can help prevent charring and aid cutting. Creality says weak airflow can reduce cutting quality. Some maker cut figures assume it: Sculpfun’s 20 mm plywood on the S40 Max is with its 50 L/min pump.
Look hereAir pumpLaser head
- Check that the pump runs, the tube has no kinks or leaks and the nozzle is clear (Creality).
- Use more air for cutting than for engraving. On xTool’s M1 Ultra the knob normally stays on AUTO, with defaults of 4 for cutting and 1 for engraving. xTool’s MAX setting is for when a damaged cable stops AUTO working.
- Check LightBurn’s Air switch for the layer if your pump is switched by the controller.
- No pump at all, and you cut more than you engrave: this is the one add-on worth buying. Lift the work on a honeycomb bed too.
Related toolsAir assist guideHow thick can a laser cut
Focus is off
xTool lists material outside the focus range as a cause of failed cuts, and Creality’s first checks for weak cutting are the lens, focus, air assist and settings. A Comgrow manual notes that some modules need a different focus distance after an air assist nozzle goes on.
Look hereLaser headBed and material
- Re-set the focus with the maker’s gauge or procedure, on the surface you are actually cutting.
- Run our ramp test: one marked line on a tilted board shows the true focus error.
- Then run a material test grid to find power and speed for this board.
Related toolsFocus ramp testMaterial test generator
Fill edges: overscanning
The head slows down to reverse at the end of each line, so the edges take more energy. LightBurn: if Fill or Image edges are darker than the middle, Overscanning is not set or is set wrongly.
Look hereSoftware
- G-code machines: turn on Overscanning in the Cut Settings for that layer. DSP controllers do it automatically.
- Leave room around the design for the head to slow down. OMTech’s “Not enough extend space” error is this same limit.
- Galvo lasers do not overscan: LightBurn handles this with the Delay settings.
Related toolsLine interval calculator
Nothing to buy for this one.
GRBL dark corners: Constant Power (M3) may be on
The Grbl wiki: M3 keeps the programmed power whether the machine is moving, accelerating or stopped; M4 follows the speed and turns off when motion stops. LightBurn’s Constant Power toggle uses M3. The head slows at a corner, so we reason that M3 puts more energy there. That link to dark corners is our own reasoning, not a line from either source.
Look hereSoftware
- Turn Constant Power off for that layer. LightBurn then uses variable power (M4).
- Already off? Lower the speed and check S-Value Max (LightBurn lists both for corner and power problems).
- M4 needs laser mode: Grbl’s “M4 requires laser mode” error is fixed with $32=1. Check it with our $$ checker.
- Watch the machine when testing M3: the Grbl wiki warns that a forgotten M3 can burn a hole through your table.
Related toolsGrbl $$ checker
Nothing to buy for this one.
GRBL pale or missing corners: acceleration
With variable power, output follows speed. LightBurn: if firmware acceleration is too low, the laser may not speed up enough after a turn to fire at the right power.
Look hereSoftware
- Read your $120 and $121 with $$. LightBurn suggests raising X and Y Max Acceleration to 100–500 in small steps, testing each time: too high causes mechanical problems.
- Or lower the speed, so the head reaches it sooner.
- Check S-Value Max matches $30 (LightBurn also lists this).
Related toolsGrbl $$ checker
Nothing to buy for this one.
Ruida and other DSP: Min Power
LightBurn: the laser slows at corners, and at or below the Start Speed the controller uses Min Power. Too high scorches or widens the kerf; too low under-burns; below the firing threshold, nothing burns. LightBurn’s example: an 80 W tube fires at around 8 %.
Look hereSoftwareCO2 tube
- Dark corners: lower Min Power. Pale or missing corners: raise it above the firing threshold.
- For slow cuts (10–20 mm/s on CO2), set Min and Max Power to the same value (LightBurn).
- Check the Start Speed in Machine Settings. LightBurn says most Ruida controllers default to 10 mm/s; some differ.
Related toolsPower and speed converter
Nothing to buy for this one.
Patches, not a pattern: material or focus
LightBurn says dark and light patches usually come from the material itself, such as wood grain. Warped material moving in and out of focus, a misaligned beam path or an untrammed gantry do it too.
Look hereBed and materialFrame
- Burn the same design on a different board. If the patches move with the board, it is the board.
- Hold it flat and re-check focus at several points.
Related toolsFocus ramp testMaterial test generator
Nothing to buy for this one.
Only on screen: nothing is wrong
LightBurn says alternating dark and lighter lines in the Preview can be a rendering artifact at certain zoom levels.
Look hereSoftware
- Zoom in or out of the Preview. If the stripes vanish, the burn is fine.
Nothing to buy for this one.
Stripes at your line spacing: line interval
If the stripes match your line interval, you are seeing the scan lines. LightBurn’s remedies for visible, stepped lines are a smaller interval or defocusing a few millimeters so that lines blend. Thunder Laser warns the other way too: lines packed too tightly go darker and softer.
Look hereSoftwareLaser head
- Work out the interval from your spot size with our calculator: lines that just touch are the starting point.
- Confirm it on the material with a test grid. Change one thing at a time.
Related toolsLine interval calculatorMaterial test generator
Nothing to buy for this one.
A repeating defect on a moving part
LightBurn says a repeated pattern typically means a defect or something stuck on a moving part, such as a lead screw or the motors driving the belts. Sculpfun says a loose belt causes banding, and a belt rubbing the pulley edge can too. A LightBurn forum user traced bands to a bad carriage wheel (one report).
Look herePulleysX beltCarriage wheels
- Measure the stripe spacing and put it in the repeat finder on this page: it tells you which part turns once in that distance.
- Power off and unplug. Clean the pulley teeth, belts and rails. Sculpfun says gear teeth collect soot and dirt.
- Check belt tension, and that each belt runs centered on its pulley.
- With the power off, move the carriage by hand. A clicking sound or bumpy feel means the wheels are too tight (Sculpfun). Adjust first; replace a wheel only if it stays.
Related toolsLine interval calculator
GRBL power scale: S-Value Max does not match $30
LightBurn: if the firmware expects 1000 and receives 255, output is roughly a quarter of what you asked for. Current GRBL defaults to 1000 and older versions use 255.
Look hereSoftware
- Type $$ in the Console and read $30.
- Set S-Value Max in Device Settings to the same number, then test again.
Related toolsGrbl $$ checker
Nothing to buy for this one.
Slipping: belt, pulley or the material
Creality’s first checks for shifted lines are a loose belt, a slipping pulley and unstable material. Sculpfun says pulleys not tight on the motor shaft cause slips. LightBurn: if layers line up in the Preview but not on the work, it is most likely mechanical.
Look herePulleysX beltY beltsBed and material
- Open the Preview. If the layers line up there, stop editing the file and look at the machine.
- Power off and unplug. Tighten the pulley grub screws, then check the belt tension.
- Tape or pin the material. Air assist and a moving head can push light pieces.
- Do not keep running a belt that slips (Creality). Replace it if it is worn.
Related toolsGrbl $$ checker
Job starts in the wrong place: a setting
LightBurn points to two things: the Start From mode with its Job Origin, and the machine’s Working Size in Device Settings.
Look hereSoftware
- Check Start From and Job Origin match where you expect the job to go.
- Check Working Size against your machine.
- Use Frame before you burn, every time.
Nothing to buy for this one.
Engraving moved after a cut: job order
LightBurn says a piece can be cut out and fall or shift before the engraving runs. Run engravings before cuts.
Look hereSoftwareBed and material
- Set the order in the Layers window, or use the Cut Optimization Settings so that engravings run before cuts.
- Check the Preview to see the actual path before you start.
Nothing to buy for this one.
Wrong size, or a circle comes out oval
LightBurn: if only the vertical size is wrong and you have used a rotary, Enable Rotary may still be on; if both are wrong, use Calibrate Axis. Creality says poor belt tension can turn a circle into an ellipse.
Look hereSoftwareX beltY belts
- Check Enable Rotary is off.
- Check the belts first, since a slipping axis will spoil the calibration.
- Burn a 100 × 100 mm square, measure it, and enter the result in LightBurn’s Calibrate Axis (Sculpfun’s method).
Related toolsRotary calculatorGrbl $$ checker
The machine stopped itself: read the warning
Newer modules stop on purpose. Creality’s Falcon2 Pro codes include tilt (01), no airflow (04), flame (05), dirty lens (06), module temperature (07) and an open cover (24). Other makers have their own lists.
Look hereWarning lightsLensAir pump
- If anything is burning, deal with the fire first, in LightBurn’s order: stop the laser and turn off the air assist, spray small flames with water, use a fire blanket or extinguisher on larger ones, and call the fire department if it keeps burning. Then air out the room and soak anything still smoldering with water. Reset only once the material is safe.
- Look up the code in your maker’s list and fix the cause: clean the lens, cool the module, check the air hose, steady the table.
- Creality lets you switch some alarms off in firmware. We would not turn off a flame or temperature alarm just to finish a job.
Related toolsWhat not to laser cut
Power dips: the controller is restarting
LightBurn: chillers and external air assists on the same circuit can cause a small drop that makes a laser brown out and reset. Sculpfun says that if the laser stops with no sign of a connection problem, the controller has usually restarted, and that air pumps cause voltage swings when they switch on.
Look herePowerAir pump
- Find out what shares the circuit: turn off the breaker for the laser’s outlet and see what else goes dark (LightBurn).
- Move the laser, or at least the pump, to another circuit.
Nothing to buy for this one.
The USB connection is dropping
Sculpfun calls USB the weakest link: one bad command can stop a job. LightBurn says “Connection lost” means the USB connection was dropped, and lists cheap unshielded cables, cable length, static and Windows power management.
Look hereUSB cableSoftware
- Try another USB port. Route the cable away from the stepper motors and power cables (LightBurn, Sculpfun).
- Check Windows power management: LightBurn says a link that works, then drops after a while, may need this changed. Also stop the PC sleeping during a job.
- If the job stutters or restarts, try Synchronous transfer mode (LightBurn).
- Belt machine with plastic wheels? LightBurn says static can discharge through the USB, and its fix is to bond the frame parts and ground the controller. Power off and unplug first. If you are not sure about grounding, ask an electrician.
- A short shielded cable, under 3 m (LightBurn). Sculpfun says the supplied cable is usually not good.
Related toolsLightBurn compatibility
A Grbl alarm in the Console
LightBurn: ALARM:1 means a limit switch was hit while moving, ALARM:2 means the job would leave the known working area, and ALARM:3 means the laser halted abruptly, usually from another alarm or a lost connection.
Look hereSoftwareFrame
- Re-home the machine: after these alarms the position is likely lost.
- Check the job fits, and that Start From and Job Origin do not send it outside the work area.
- Only for a Y-axis rotary whose travel exceeds the limit: LightBurn says Soft Limits can be turned off with $20=0. Turn them back on with $20=1 when you return to flat engraving.
Related toolsGrbl $$ checker
Nothing to buy for this one.
Nothing moves: connection or a safety stop
LightBurn’s list when a laser will not respond: look for on-screen errors, enclosed lasers may refuse to run with the lid open and water-cooled ones without water flow, the wrong serial port, and other software holding the port. OMTech adds the emergency stop button.
Look hereUSB cableSoftwareWarning lights
- Look for error messages or warning lights, and close the lid. Release the emergency stop if it is pressed (OMTech).
- Pick the right port: it is the one that disappears when you turn the laser off (LightBurn).
- Close any other software talking to the laser, and try another cable. Some USB-C machines need a USB-A to C cable, not C to C (LightBurn).
Related toolsLightBurn compatibility
The head runs the job with no mark: settings
LightBurn calls speed “the most common cause” of low or no output on GRBL: in variable power mode, power rises with speed, so if the commanded speed is never reached the power is not either. A wrong S-Value Max or a layer with Output off does the same.
Look hereSoftware
- Check the layer’s Output toggle is on, and that the power is not zero.
- Check the units: 100 mm/s is 6,000 mm/min. Compare your speed with $110 and $111, which are in mm/min.
- Check that S-Value Max matches $30, and $32 is 1. Sculpfun’s values for its machines are $30=1000, $31=0, $32=1.
Related toolsGrbl $$ checkerPower and speed converter
Nothing to buy for this one.
No Fire button: it is off by default
LightBurn only shows Fire if you turn on “Enable Laser Fire Button” in Device Settings, and framing does not fire unless “Laser on when framing” is on. LightBurn says Fire is for diode lasers only and should never be used on a CO2 laser, whose invisible beam could blind you or start a fire.
Look hereSoftwareLaser head
- Diode only: turn on Enable Laser Fire Button and leave Laser on when framing off. Use Fire at very low power: LightBurn’s tutorial starts at 0.25 %, raising it only if the dot is not visible.
- Wear glasses rated for your laser and look at the dot on the material, never into the beam.
- Turn Fire off as soon as you are done. Do not walk away from it.
Related toolsSafety glasses checker
A dark diode: firmware, then the cable, module last
Sculpfun’s order: if the hardware connections seem fine, check $30, $31 and $32. It also warns that the module plug often works loose, which shows up as total failure or as parts of the job missing, and that a broken cable usually breaks right at the connector.
Look hereLaser headSoftwarePower
- Check the firmware: on Sculpfun machines, $30=1000, $31=0, $32=1.
- Power off and unplug. Reseat the module plug and secure the cable so it does not move at the connector (Sculpfun uses a cable tie).
- Check any cover, lens or lid sensor your model has, and its warning lights.
- A broken wire at the plug can be re-crimped: Sculpfun lists JST-XH 2.54 connectors for the module. Power off and unplug, note the wire order before you cut, and do this only if you are comfortable with it.
- Ask the maker’s support before buying a module. It may be under warranty.
Related toolsGrbl $$ checkerLightBurn compatibility
CO2 or enclosed: a safety interlock is holding it
LightBurn: enclosed lasers may refuse to run with the lid open, and water-cooled ones without detected water flow. OMTech: the water sensor stops the tube firing when no flow is detected, to protect it from heat.
Look hereWater flowLid sensorWarning lights
- Read the panel: “Water Error” or “Cooler Error” is the water system; “Machine Protected” or “Open Cover Protection” is the lid sensor (OMTech).
- Water: is the chiller or pump on? Check for kinks and leaks. The pump outlet must feed the tube inlet (OMTech).
- Lid: shut it fully and check the sensor lines up with the door when closed (OMTech).
- Do not defeat these sensors. Some guides show how, but without water the tube can overheat, and an open lid exposes you to the beam.
- A sensor that stays faulty after these checks needs replacing: ask the maker.
Related toolsSafety glasses checker
Nothing to buy for this one.
CO2 with no error: read the mA meter
OMTech’s test: set 25 % or more, pulse the laser and watch the mA reading. If it rises but there is no beam, the supply is sending power and the tube may be at fault. If it stays put, go to the power supply. If it is in range but the beam is weak, the cause is typically dirty optics or misaligned mirrors.
Look hereCO2 tubeMirrorsPower
- Run the pulse test with water flowing, scrap under the head and the lid shut (that setup is our own precaution). OMTech’s chart for 50–80 W cabinet lasers reads 6–8 mA at 25 %; use your own maker’s figures.
- Check you are above the firing threshold. LightBurn’s example: an 80 W tube fires at around 8 %.
- Power off and unplug, clean the mirrors and lens, then check mirror alignment (OMTech).
- Tube or supply: OMTech asks for a video of the setting, display and tube before it diagnoses. Leave the high-voltage parts to the maker: high voltage is dangerous.
Related toolsReal laser power
Nothing to buy for this one.
GRBL burns between shapes: laser mode is off
LightBurn: with GRBL 1.1f or later, the likely cause is the controller not being in Laser Mode. The Grbl wiki lists $32=1 as the switch for it.
Look hereSoftware
- Stop the job with the software’s Stop or the machine’s stop control. Do not pull the USB cable to stop a job. If Stop does not work or there is a fire, cut the power with the emergency stop or the machine’s power switch.
- Type $32=1 in the Console and press Enter.
- Burn a small test on scrap and watch it.
- $32 is already 1 and it still burns lines? Check in the Preview that the lines are not shapes in the file. If they are not, stop real work and ask the maker. LightBurn does not cover this case, and a laser that does not switch off is a fire risk.
Related toolsGrbl $$ checkerLightBurn compatibility
Nothing to buy for this one.
Ruida or DSP burns between shapes: suspect the power supply
LightBurn says this most likely means a failing high-voltage power supply: the circuit that switches the laser on and off tends to fail before the part that sets the power.
Look herePowerSoftware
- Stop using it for real work. A laser that does not switch off during travel is a fire risk, so stay right there if you test it.
- Check the job in Preview to confirm the lines are travel moves, not shapes in the file.
- Contact your laser’s maker for a replacement supply (LightBurn). Do not open it yourself: it is high voltage.
Nothing to buy for this one.
Causes come from maker and LightBurn documents, not from testing your machine. Power off and unplug before you touch anything.
 Before you touch anything
 Power off and unplugEvery time, before you touch a belt, wheel or lens. LightBurn, xTool and Creality all start here.
 Let it coolCreality says to let the module cool before you take it off.
- If it catches fireLightBurn’s order: stop the laser and turn off the air assist, spray small flames with water, use a fire blanket or extinguisher on larger ones, and call the fire department if it keeps burning. Then air out the room and soak anything still smoldering with water.
- Keep a Class C extinguisherClass C (safe for electrical fires) is a must. LightBurn prefers CO2: it does not damage the laser, but is somewhat less effective on combustibles than dry powder. Dry powder works well, but its corrosive powder can ruin the machine. Full Spectrum’s manual lists halogen or dry chemical, so makers differ.
 Never look into the beamWear glasses rated for your wavelength. Inspect a lens with a phone camera or a mirror, with the power off.
 Do not pull the USB cable to stop a jobUse the software’s Stop or the machine’s stop control. Grbl keeps running what it has already received, and M3 stays at power even when the head stops. If Stop does not work or there is a fire, cut the power with the emergency stop or the machine’s power switch (LightBurn Fire Safety).
- Do not defeat safety devicesDo not turn off a water sensor, lid sensor or flame alarm just to finish a job.
 Burn one test card first
A single small burn answers several questions at once. It uses the tests the makers already use: xTool’s large square, Sculpfun’s 100 mm calibration square and LightBurn’s 50 × 10 mm fill, plus a circle to show whether closed shapes join up.
Before you run this: Use scrap and settings that have burned safely before. Wear glasses rated for your laser (or keep the enclosure shut). Check the material is safe to laser, run the exhaust and stay with the machine, with an extinguisher within reach. On GRBL, check $30, S-Value Max and $32=1 first.
- Import the SVG. Red is line work, black is fill. LightBurn puts each color on its own layer.
- Set the red layer to Line and the black layer to Fill, with Overscanning on (G-code machines).
- Measure that the square is 100 mm, check its corners and whether the circle closes, and look at the fill edges closely.
Jump to a symptom: Wavy lines · Double lines, ghosting · Not cutting through · Burned corners · Stripes, banding · Faint burn · Position shift · Stops midway · Not firing · Extra lines
 Laser engraver wavy lines, or lines not straight
A straight line that comes out with ripples usually means something in the motion system is loose, slipping or asked to move too hard. xTool’s test is to engrave a large square and see whether the X lines or the Y lines wave: that tells you which axis to open up. Diagnose this symptom ↑
The X axis: belt, rail or head carriage
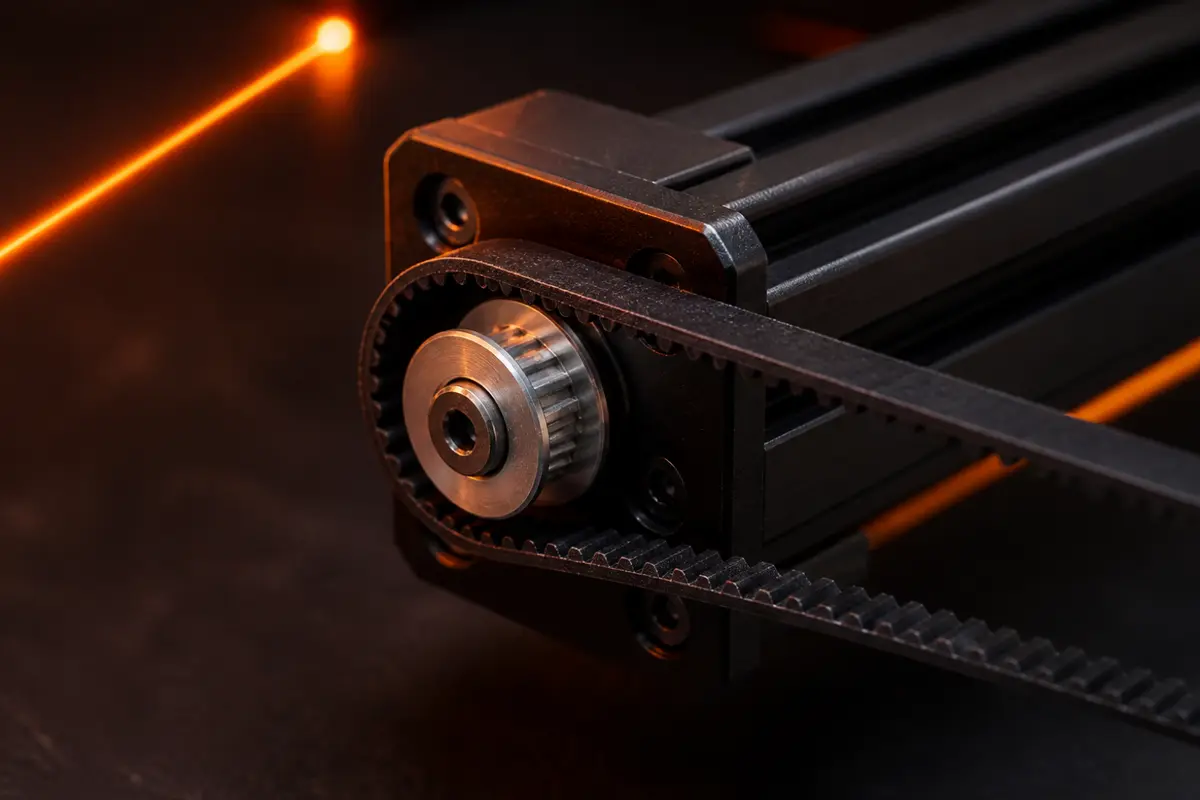
When “X-axis lines” wave, xTool lists the X belt tension, a deformed, blocked or worn X rail, a loose head plate and damaged bearings. xTool does not define which way those lines run. Reading them as lines drawn by the X axis is our assumption, so if working on this axis does not cure it, check the other one too. Sculpfun adds the carriage wheel, which should just touch the frame.
- Power off and unplug. Pluck the X belt: LightBurn says it should be taut but not overtightened, and pluck like a guitar string. Creality’s check is to press it midway: it should give slightly, not hang loose.
- Gently rock the head carriage from side to side. If it moves, Sculpfun raises the lower wheel with the eccentric nut, a quarter turn at a time, and stops as soon as the play is gone.
- Wipe the rail and wheels and clear anything stuck on them. xTool then looks for rust and wear, and greases the rail.
- Frayed, cracked or missing teeth: replace the belt (Creality).
- A bent rail or damaged bearings: xTool replaces the rail and sends bearing questions to its support.
Related toolsGrbl $$ checker
The Y axis: belts, rails or drive shaft
When “Y-axis lines” wave, xTool lists the Y belt tension, deformed, blocked or worn Y rails, and a deformed drive shaft or loose coupling. xTool does not define which way those lines run. Reading them as lines drawn by the Y axis is our assumption, so if working on this axis does not cure it, check the other one too.
- Power off and unplug. Check the belts on both sides of the machine: same tension, none hanging loose.
- Wipe the Y rails. Look for rust and wear. Grease them if your manual allows it (xTool does; Creality says a thin layer, wiped back).
- On a shaft-driven machine, check the coupling is tight and both shaft ends are fully seated (xTool). On any machine, check the small grub screws on the pulleys (Sculpfun).
- Visible belt damage: replace the belt. Creality says not to keep running a belt that slips.
- A bent drive shaft or deformed rail: ask the maker about a replacement (xTool).
Related toolsGrbl $$ checker
Too fast or too hard for this frame
LightBurn says quality is not always preserved near a machine’s theoretical top speed, and ties line wobble to high Y acceleration. The Grbl wiki says a grinding sound means the motors are losing steps.
- Run the same job at half the speed and stay with it: half the speed doubles the energy per millimeter, so it burns darker and can flare. Halve the power too to keep the energy about the same. If the lines come out straight, speed is the cause.
- Lower the acceleration a little: $120 and $121 on Grbl. Sculpfun’s guide suggests 250 mm/s² for its machines. Other makers differ, so note your values first.
- If you are tuning limits, do it with the laser off, using G0 moves. The Grbl wiki’s method: raise the value until the motor stalls, then set it 10–20 % below that.
Related toolsGrbl $$ checkerPower and speed converter
Something is loose
LightBurn blames wobbly engraves on inertia finding play in the mechanics. Besides belts and rails it names unsecured lenses, mirrors, toolheads, axes and frames. Sculpfun says many users found pulleys not tightened enough on the motor shafts.
- Power off and unplug, then do LightBurn’s wiggle test: gently move each part by hand and tighten whatever moves.
- Check the head: is the laser module firm on its plate? Is the lens or nozzle loose?
- Tighten the pulley grub screws and center each belt on its pulley. Sculpfun says a belt rubbing the pulley edge adds friction.
- Only if a belt or wheel is actually worn: replace that part.
Related toolsGrbl $$ checker
The table is moving, not the laser
If nothing on the machine is loose, LightBurn says inertia may be carrying into the table or moving your material.
- LightBurn’s test: put the laser on the floor if you can, and run the job again.
- If that cures it, stiffen the table with cross-bracing or a backer board.
- Make sure the material cannot shift: tape or pin it down.
Square is not square: frame or lost steps
For gantry machines where both lines and fills lean, LightBurn lists a misaligned frame or mirrors, motors losing steps (for example from overheating) and other mechanical issues.
- Sculpfun’s frame check: with the power off, move the gantry fully to the front and back. Both ends should reach the frame at the same time.
- Measure the diagonals of a burned square. If they differ, the axes are not at right angles (plain geometry).
- Motors hot to the touch after a long job? Let them cool and lower the speed.
- Ruida machine and only the fill leans: LightBurn points to the “PWM Rising Edge Valid” vendor setting. Galvo: run Lens Correction.
Related toolsGrbl $$ checker
Laser engraver ghosting and double lines
A second, fainter edge has different causes depending on the job. In a fast fill, it is often scan lines that do not line up between the left-going and right-going passes. In a single vector line on a CO2 machine, it can be the beam itself. And sometimes the file really does contain two copies. Diagnose this symptom ↑
Scan lines out of step: scanning offset
LightBurn: power supplies, tubes and belts respond with a slight delay, which shifts the output and gives “ghosted edges”, more visible at high speed. Thunder Laser says to check these values before you touch the image.
- First rule out loose belts (LightBurn says slipping looks similar).
- Burn a 50 × 10 mm Fill, 0.5 mm line interval, at several speeds. On G-code machines turn on Overscanning at 5 % or more; Ruida does it automatically.
- Measure the gap between the line ends at each speed, and enter half of it in Device Settings › Scanning Offset Adjustment.
Related toolsLine interval calculator
CO2: the beam may be clipping the nozzle
A summary of Thunder Laser’s help page says double lines in vector work come from the beam reflecting or refracting off the nozzle opening, and that the fix is the beam’s verticality in the head. We could read only a summary of that page.
- Power off. Clean the mirrors and focus lens with a cotton pad or microfiber cloth and isopropyl alcohol (OMTech).
- Follow your maker’s mirror alignment guide, one mirror at a time. Thunder Laser’s alignment guide squares the gantry first and does not move on until each stage is right.
- Beam tests are done at low power with the lid shut wherever the procedure allows. A CO2 beam is invisible: wear 10,600 nm glasses and keep your hands out of the beam path.
- A lens still dirty, scratched or damaged after cleaning must be replaced (OMTech).
Related toolsSafety glasses checker
The file burns it twice
If the Preview shows it too, the machine is doing what it was told. LightBurn: shapes that overlap on different layers are each engraved in full, and with a filled view, hidden objects behind others still engrave.
- Switch to Wireframe view to reveal hidden graphics, and delete what you do not need.
- Put overlapping shapes on one layer, then check the Preview again.
 Laser cutter not cutting through
Start with what changed. If it used to cut this material with these settings, something has drifted, and the lens is the first suspect. If it has never cut it, the settings, the focus or the laser’s own limits are the place to look. Replacing the laser is the last step, not the first. Diagnose this symptom ↑
A dirty or damaged lens
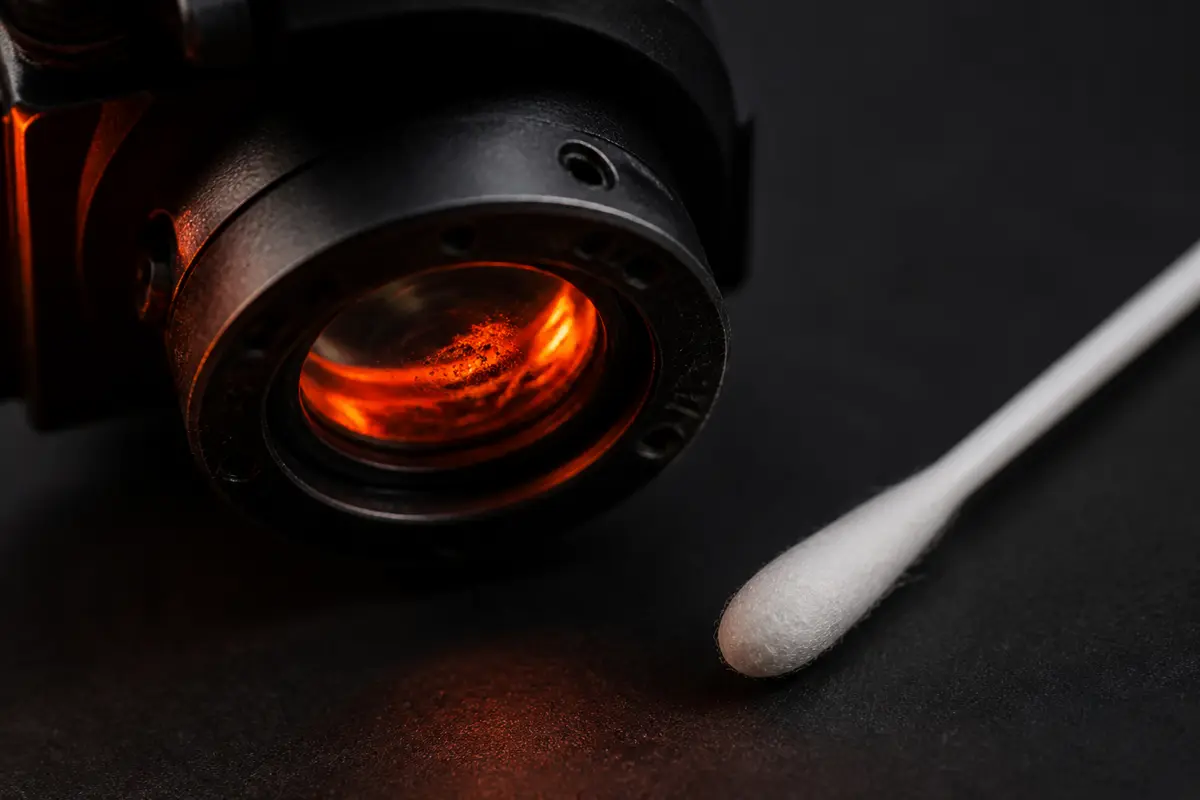
Creality says a dirty lens can reduce power and cause weak cuts. Sculpfun says dirt on the lens heats up in the beam until the lens goes blind or cracks, and calls this the most common cause of declining laser performance.
- Power off, unplug, let it cool. Look at the lens with a phone camera or a mirror (xTool). Never look up into the head with the machine on.
- Clean it gently: xTool and Sculpfun use a cotton swab with alcohol or isopropanol; Creality says a dust-free cloth and no unknown chemicals. Follow your manual.
- Re-focus and run the same job again (Creality does this before calling a lens bad).
- Lens fouls quickly? Sculpfun says to keep the air pump outside the enclosure, where it breathes clean air.
- Cracked, cloudy, burned or still weak after cleaning: replace the lens (Creality). Lenses are model-specific, so match yours first.
Related toolsFocus ramp testAir assist guide
Focus is off
xTool lists material outside the focus range as a cause of failed cuts, and Creality’s first checks for weak cutting are the lens, focus, air assist and settings. A Comgrow manual notes that some modules need a different focus distance after an air assist nozzle goes on.
- Re-set the focus with the maker’s gauge or procedure, on the surface you are actually cutting.
- Run our ramp test: one marked line on a tilted board shows the true focus error.
- Then run a material test grid to find power and speed for this board.
Related toolsFocus ramp testMaterial test generator
Weak or missing air assist
LightBurn’s manual says air assist can help prevent charring and aid cutting. Creality says weak airflow can reduce cutting quality. Some maker cut figures assume it: Sculpfun’s 20 mm plywood on the S40 Max is with its 50 L/min pump.
- Check that the pump runs, the tube has no kinks or leaks and the nozzle is clear (Creality).
- Use more air for cutting than for engraving. On xTool’s M1 Ultra the knob normally stays on AUTO, with defaults of 4 for cutting and 1 for engraving. xTool’s MAX setting is for when a damaged cable stops AUTO working.
- Check LightBurn’s Air switch for the layer if your pump is switched by the controller.
- No pump at all, and you cut more than you engrave: this is the one add-on worth buying. Lift the work on a honeycomb bed too.
Related toolsAir assist guideHow thick can a laser cut
This job is beyond this laser
xTool says its blue-laser modules cannot cut transparent materials, metal or ceramic. Thickness has limits too: compare yours with the maker’s own figure, and read how that figure was made.
- Check the laser type against the material on our matrix.
- Check the thickness against the maker’s cut figure and its conditions, such as passes and air assist.
- Try more passes at a lower speed on scrap, up to what is safe. Stay with the machine: more heat means more risk of flames.
Related toolsDiode vs CO2 vs fiberHow thick can a laser cutWhat not to laser cut
The work is out of focus across the bed
LightBurn: warped or uneven material moves in and out of focus, and a misaligned beam path or a gantry not parallel to the work does the same. xTool also lists a warped baseplate or material when cuts fail.
- Hold the material flat (pins, tape, weights outside the burn area) and try again.
- With the power off, measure the gap from nozzle to work at the four corners. They should match.
- CO2 and weak only on one side? xTool notes a deviated beam path makes performance vary across the area. Clean the mirrors and check alignment.
Related toolsFocus ramp test
A hot or aging laser source: check this last
xTool says continuous high-power use can temporarily reduce output, and that power loss from aging cannot be reversed. Rule out the lens, focus and settings first: those cost nothing, and a new module costs a lot.
- Power off for about 5 minutes, then test again (xTool’s M1 advice). Creality’s ERROR:07 also asks you to clean and cool the module.
- Burn a known job: same material, thickness and default settings as when it last worked. Keep a photo so you can compare.
- Work around it: more power, more passes or lower speed (xTool).
- Still weak: send your test to the maker’s support before buying anything. A module or tube may be under warranty. CO2 owners can use OMTech’s mA test (under “not firing”).
Related toolsReal laser powerMachine list
Laser burning corners and dark edges
The head has to slow down at every corner and at the end of every scan line. Energy per millimeter is power divided by speed, so if the power does not fall with the speed, those spots get more. Which setting handles this depends on your controller. Diagnose this symptom ↑
Fill edges: overscanning
The head slows down to reverse at the end of each line, so the edges take more energy. LightBurn: if Fill or Image edges are darker than the middle, Overscanning is not set or is set wrongly.
- G-code machines: turn on Overscanning in the Cut Settings for that layer. DSP controllers do it automatically.
- Leave room around the design for the head to slow down. OMTech’s “Not enough extend space” error is this same limit.
- Galvo lasers do not overscan: LightBurn handles this with the Delay settings.
Related toolsLine interval calculator
GRBL dark corners: Constant Power (M3) may be on
The Grbl wiki: M3 keeps the programmed power whether the machine is moving, accelerating or stopped; M4 follows the speed and turns off when motion stops. LightBurn’s Constant Power toggle uses M3. The head slows at a corner, so we reason that M3 puts more energy there. That link to dark corners is our own reasoning, not a line from either source.
- Turn Constant Power off for that layer. LightBurn then uses variable power (M4).
- Already off? Lower the speed and check S-Value Max (LightBurn lists both for corner and power problems).
- M4 needs laser mode: Grbl’s “M4 requires laser mode” error is fixed with $32=1. Check it with our $$ checker.
- Watch the machine when testing M3: the Grbl wiki warns that a forgotten M3 can burn a hole through your table.
Related toolsGrbl $$ checker
GRBL pale or missing corners: acceleration
With variable power, output follows speed. LightBurn: if firmware acceleration is too low, the laser may not speed up enough after a turn to fire at the right power.
- Read your $120 and $121 with $$. LightBurn suggests raising X and Y Max Acceleration to 100–500 in small steps, testing each time: too high causes mechanical problems.
- Or lower the speed, so the head reaches it sooner.
- Check S-Value Max matches $30 (LightBurn also lists this).
Related toolsGrbl $$ checker
Ruida and other DSP: Min Power
LightBurn: the laser slows at corners, and at or below the Start Speed the controller uses Min Power. Too high scorches or widens the kerf; too low under-burns; below the firing threshold, nothing burns. LightBurn’s example: an 80 W tube fires at around 8 %.
- Dark corners: lower Min Power. Pale or missing corners: raise it above the firing threshold.
- For slow cuts (10–20 mm/s on CO2), set Min and Max Power to the same value (LightBurn).
- Check the Start Speed in Machine Settings. LightBurn says most Ruida controllers default to 10 mm/s; some differ.
Related toolsPower and speed converter
 Stripes and banding in engraved fills
First decide whether the stripes are real, and whether they are regular. Random patches usually come from the material. Regular stripes point to something that repeats: your line spacing, or a part that turns. The spacing of the stripes is a clue you can measure. Diagnose this symptom ↑
A repeating defect on a moving part
LightBurn says a repeated pattern typically means a defect or something stuck on a moving part, such as a lead screw or the motors driving the belts. Sculpfun says a loose belt causes banding, and a belt rubbing the pulley edge can too. A LightBurn forum user traced bands to a bad carriage wheel (one report).
- Measure the stripe spacing and put it in the repeat finder on this page: it tells you which part turns once in that distance.
- Power off and unplug. Clean the pulley teeth, belts and rails. Sculpfun says gear teeth collect soot and dirt.
- Check belt tension, and that each belt runs centered on its pulley.
- With the power off, move the carriage by hand. A clicking sound or bumpy feel means the wheels are too tight (Sculpfun). Adjust first; replace a wheel only if it stays.
Related toolsLine interval calculator
Stripes at your line spacing: line interval
If the stripes match your line interval, you are seeing the scan lines. LightBurn’s remedies for visible, stepped lines are a smaller interval or defocusing a few millimeters so that lines blend. Thunder Laser warns the other way too: lines packed too tightly go darker and softer.
- Work out the interval from your spot size with our calculator: lines that just touch are the starting point.
- Confirm it on the material with a test grid. Change one thing at a time.
Related toolsLine interval calculatorMaterial test generator
Patches, not a pattern: material or focus
LightBurn says dark and light patches usually come from the material itself, such as wood grain. Warped material moving in and out of focus, a misaligned beam path or an untrammed gantry do it too.
- Burn the same design on a different board. If the patches move with the board, it is the board.
- Hold it flat and re-check focus at several points.
Related toolsFocus ramp testMaterial test generator
Only on screen: nothing is wrong
LightBurn says alternating dark and lighter lines in the Preview can be a rendering artifact at certain zoom levels.
- Zoom in or out of the Preview. If the stripes vanish, the burn is fine.
Find the part from the stripe spacing
LightBurn traces repeating patterns to a defect on a moving part. It follows that a part covering that distance in one turn is a suspect. That step is our own reasoning, and a match is a place to look, not a verdict. Power off and go and look at the part.
The belt values are a common 2 mm GT2 belt on a 20-tooth pulley, as in the Grbl checker. Use your own if you know them.
Above: your stripes at scale. Below: the distance each part covers in one repeat. Our own reasoning, not a maker’s rule.
 Laser engraving faint or weak
A faint burn has the same suspects as a failed cut, in a slightly different order. On GRBL machines, check one number first, because a wrong power scale costs nothing to fix and can take away three quarters of your power. Diagnose this symptom ↑
GRBL power scale: S-Value Max does not match $30
LightBurn: if the firmware expects 1000 and receives 255, output is roughly a quarter of what you asked for. Current GRBL defaults to 1000 and older versions use 255.
- Type $$ in the Console and read $30.
- Set S-Value Max in Device Settings to the same number, then test again.
Related toolsGrbl $$ checker
A dirty or damaged lens
Creality says a dirty lens can reduce power and cause weak cuts. Sculpfun says dirt on the lens heats up in the beam until the lens goes blind or cracks, and calls this the most common cause of declining laser performance.
- Power off, unplug, let it cool. Look at the lens with a phone camera or a mirror (xTool). Never look up into the head with the machine on.
- Clean it gently: xTool and Sculpfun use a cotton swab with alcohol or isopropanol; Creality says a dust-free cloth and no unknown chemicals. Follow your manual.
- Re-focus and run the same job again (Creality does this before calling a lens bad).
- Lens fouls quickly? Sculpfun says to keep the air pump outside the enclosure, where it breathes clean air.
- Cracked, cloudy, burned or still weak after cleaning: replace the lens (Creality). Lenses are model-specific, so match yours first.
Related toolsFocus ramp testAir assist guide
Focus is off
xTool lists material outside the focus range as a cause of failed cuts, and Creality’s first checks for weak cutting are the lens, focus, air assist and settings. A Comgrow manual notes that some modules need a different focus distance after an air assist nozzle goes on.
- Re-set the focus with the maker’s gauge or procedure, on the surface you are actually cutting.
- Run our ramp test: one marked line on a tilted board shows the true focus error.
- Then run a material test grid to find power and speed for this board.
Related toolsFocus ramp testMaterial test generator
The head runs the job with no mark: settings
LightBurn calls speed “the most common cause” of low or no output on GRBL: in variable power mode, power rises with speed, so if the commanded speed is never reached the power is not either. A wrong S-Value Max or a layer with Output off does the same.
- Check the layer’s Output toggle is on, and that the power is not zero.
- Check the units: 100 mm/s is 6,000 mm/min. Compare your speed with $110 and $111, which are in mm/min.
- Check that S-Value Max matches $30, and $32 is 1. Sculpfun’s values for its machines are $30=1000, $31=0, $32=1.
Related toolsGrbl $$ checkerPower and speed converter
The work is out of focus across the bed
LightBurn: warped or uneven material moves in and out of focus, and a misaligned beam path or a gantry not parallel to the work does the same. xTool also lists a warped baseplate or material when cuts fail.
- Hold the material flat (pins, tape, weights outside the burn area) and try again.
- With the power off, measure the gap from nozzle to work at the four corners. They should match.
- CO2 and weak only on one side? xTool notes a deviated beam path makes performance vary across the area. Clean the mirrors and check alignment.
Related toolsFocus ramp test
Engraving shifted, wrong place or wrong size
A shift halfway through a job and a job that starts in the wrong place look similar afterwards but have nothing in common. One is the machine losing its position, and the other is a setting. LightBurn’s test separates them: if the Preview looks right and the work does not, it is most likely mechanical. Diagnose this symptom ↑
Slipping: belt, pulley or the material
Creality’s first checks for shifted lines are a loose belt, a slipping pulley and unstable material. Sculpfun says pulleys not tight on the motor shaft cause slips. LightBurn: if layers line up in the Preview but not on the work, it is most likely mechanical.
- Open the Preview. If the layers line up there, stop editing the file and look at the machine.
- Power off and unplug. Tighten the pulley grub screws, then check the belt tension.
- Tape or pin the material. Air assist and a moving head can push light pieces.
- Do not keep running a belt that slips (Creality). Replace it if it is worn.
Related toolsGrbl $$ checker
Too fast or too hard for this frame
LightBurn says quality is not always preserved near a machine’s theoretical top speed, and ties line wobble to high Y acceleration. The Grbl wiki says a grinding sound means the motors are losing steps.
- Run the same job at half the speed and stay with it: half the speed doubles the energy per millimeter, so it burns darker and can flare. Halve the power too to keep the energy about the same. If the lines come out straight, speed is the cause.
- Lower the acceleration a little: $120 and $121 on Grbl. Sculpfun’s guide suggests 250 mm/s² for its machines. Other makers differ, so note your values first.
- If you are tuning limits, do it with the laser off, using G0 moves. The Grbl wiki’s method: raise the value until the motor stalls, then set it 10–20 % below that.
Related toolsGrbl $$ checkerPower and speed converter
Job starts in the wrong place: a setting
LightBurn points to two things: the Start From mode with its Job Origin, and the machine’s Working Size in Device Settings.
- Check Start From and Job Origin match where you expect the job to go.
- Check Working Size against your machine.
- Use Frame before you burn, every time.
Engraving moved after a cut: job order
LightBurn says a piece can be cut out and fall or shift before the engraving runs. Run engravings before cuts.
- Set the order in the Layers window, or use the Cut Optimization Settings so that engravings run before cuts.
- Check the Preview to see the actual path before you start.
Wrong size, or a circle comes out oval
LightBurn: if only the vertical size is wrong and you have used a rotary, Enable Rotary may still be on; if both are wrong, use Calibrate Axis. Creality says poor belt tension can turn a circle into an ellipse.
- Check Enable Rotary is off.
- Check the belts first, since a slipping axis will spoil the calibration.
- Burn a 100 × 100 mm square, measure it, and enter the result in LightBurn’s Calibrate Axis (Sculpfun’s method).
Related toolsRotary calculatorGrbl $$ checker
Laser stops in the middle of a job
The clue is what you see at the moment it stops. A warning light means the machine chose to stop. “Connection lost” or a machine that re-homes means the link or the power dropped. An ALARM line in the Console tells you what made Grbl stop. Diagnose this symptom ↑
The machine stopped itself: read the warning
Newer modules stop on purpose. Creality’s Falcon2 Pro codes include tilt (01), no airflow (04), flame (05), dirty lens (06), module temperature (07) and an open cover (24). Other makers have their own lists.
- If anything is burning, deal with the fire first, in LightBurn’s order: stop the laser and turn off the air assist, spray small flames with water, use a fire blanket or extinguisher on larger ones, and call the fire department if it keeps burning. Then air out the room and soak anything still smoldering with water. Reset only once the material is safe.
- Look up the code in your maker’s list and fix the cause: clean the lens, cool the module, check the air hose, steady the table.
- Creality lets you switch some alarms off in firmware. We would not turn off a flame or temperature alarm just to finish a job.
Related toolsWhat not to laser cut
The USB connection is dropping
Sculpfun calls USB the weakest link: one bad command can stop a job. LightBurn says “Connection lost” means the USB connection was dropped, and lists cheap unshielded cables, cable length, static and Windows power management.
- Try another USB port. Route the cable away from the stepper motors and power cables (LightBurn, Sculpfun).
- Check Windows power management: LightBurn says a link that works, then drops after a while, may need this changed. Also stop the PC sleeping during a job.
- If the job stutters or restarts, try Synchronous transfer mode (LightBurn).
- Belt machine with plastic wheels? LightBurn says static can discharge through the USB, and its fix is to bond the frame parts and ground the controller. Power off and unplug first. If you are not sure about grounding, ask an electrician.
- A short shielded cable, under 3 m (LightBurn). Sculpfun says the supplied cable is usually not good.
Related toolsLightBurn compatibility
Power dips: the controller is restarting
LightBurn: chillers and external air assists on the same circuit can cause a small drop that makes a laser brown out and reset. Sculpfun says that if the laser stops with no sign of a connection problem, the controller has usually restarted, and that air pumps cause voltage swings when they switch on.
- Find out what shares the circuit: turn off the breaker for the laser’s outlet and see what else goes dark (LightBurn).
- Move the laser, or at least the pump, to another circuit.
A Grbl alarm in the Console
LightBurn: ALARM:1 means a limit switch was hit while moving, ALARM:2 means the job would leave the known working area, and ALARM:3 means the laser halted abruptly, usually from another alarm or a lost connection.
- Re-home the machine: after these alarms the position is likely lost.
- Check the job fits, and that Start From and Job Origin do not send it outside the work area.
- Only for a Y-axis rotary whose travel exceeds the limit: LightBurn says Soft Limits can be turned off with $20=0. Turn them back on with $20=1 when you return to flat engraving.
Related toolsGrbl $$ checker
LightBurn: laser not firing
Most “dead” lasers are settings or safety stops. Work through these before you price a new module. LightBurn’s Fire button and laser-on framing have to be turned on, so a missing dot during framing is not a fault. Fire is for diode lasers only: never use it on a CO2 laser. Diagnose this symptom ↑
The head runs the job with no mark: settings
LightBurn calls speed “the most common cause” of low or no output on GRBL: in variable power mode, power rises with speed, so if the commanded speed is never reached the power is not either. A wrong S-Value Max or a layer with Output off does the same.
- Check the layer’s Output toggle is on, and that the power is not zero.
- Check the units: 100 mm/s is 6,000 mm/min. Compare your speed with $110 and $111, which are in mm/min.
- Check that S-Value Max matches $30, and $32 is 1. Sculpfun’s values for its machines are $30=1000, $31=0, $32=1.
Related toolsGrbl $$ checkerPower and speed converter
No Fire button: it is off by default
LightBurn only shows Fire if you turn on “Enable Laser Fire Button” in Device Settings, and framing does not fire unless “Laser on when framing” is on. LightBurn says Fire is for diode lasers only and should never be used on a CO2 laser, whose invisible beam could blind you or start a fire.
- Diode only: turn on Enable Laser Fire Button and leave Laser on when framing off. Use Fire at very low power: LightBurn’s tutorial starts at 0.25 %, raising it only if the dot is not visible.
- Wear glasses rated for your laser and look at the dot on the material, never into the beam.
- Turn Fire off as soon as you are done. Do not walk away from it.
Related toolsSafety glasses checker
A dark diode: firmware, then the cable, module last
Sculpfun’s order: if the hardware connections seem fine, check $30, $31 and $32. It also warns that the module plug often works loose, which shows up as total failure or as parts of the job missing, and that a broken cable usually breaks right at the connector.
- Check the firmware: on Sculpfun machines, $30=1000, $31=0, $32=1.
- Power off and unplug. Reseat the module plug and secure the cable so it does not move at the connector (Sculpfun uses a cable tie).
- Check any cover, lens or lid sensor your model has, and its warning lights.
- A broken wire at the plug can be re-crimped: Sculpfun lists JST-XH 2.54 connectors for the module. Power off and unplug, note the wire order before you cut, and do this only if you are comfortable with it.
- Ask the maker’s support before buying a module. It may be under warranty.
Related toolsGrbl $$ checkerLightBurn compatibility
Nothing moves: connection or a safety stop
LightBurn’s list when a laser will not respond: look for on-screen errors, enclosed lasers may refuse to run with the lid open and water-cooled ones without water flow, the wrong serial port, and other software holding the port. OMTech adds the emergency stop button.
- Look for error messages or warning lights, and close the lid. Release the emergency stop if it is pressed (OMTech).
- Pick the right port: it is the one that disappears when you turn the laser off (LightBurn).
- Close any other software talking to the laser, and try another cable. Some USB-C machines need a USB-A to C cable, not C to C (LightBurn).
Related toolsLightBurn compatibility
CO2 or enclosed: a safety interlock is holding it
LightBurn: enclosed lasers may refuse to run with the lid open, and water-cooled ones without detected water flow. OMTech: the water sensor stops the tube firing when no flow is detected, to protect it from heat.
- Read the panel: “Water Error” or “Cooler Error” is the water system; “Machine Protected” or “Open Cover Protection” is the lid sensor (OMTech).
- Water: is the chiller or pump on? Check for kinks and leaks. The pump outlet must feed the tube inlet (OMTech).
- Lid: shut it fully and check the sensor lines up with the door when closed (OMTech).
- Do not defeat these sensors. Some guides show how, but without water the tube can overheat, and an open lid exposes you to the beam.
- A sensor that stays faulty after these checks needs replacing: ask the maker.
Related toolsSafety glasses checker
CO2 with no error: read the mA meter
OMTech’s test: set 25 % or more, pulse the laser and watch the mA reading. If it rises but there is no beam, the supply is sending power and the tube may be at fault. If it stays put, go to the power supply. If it is in range but the beam is weak, the cause is typically dirty optics or misaligned mirrors.
- Run the pulse test with water flowing, scrap under the head and the lid shut (that setup is our own precaution). OMTech’s chart for 50–80 W cabinet lasers reads 6–8 mA at 25 %; use your own maker’s figures.
- Check you are above the firing threshold. LightBurn’s example: an 80 W tube fires at around 8 %.
- Power off and unplug, clean the mirrors and lens, then check mirror alignment (OMTech).
- Tube or supply: OMTech asks for a video of the setting, display and tube before it diagnoses. Leave the high-voltage parts to the maker: high voltage is dangerous.
Related toolsReal laser power
Lines burned between shapes
If the laser stays on while the head travels between shapes, stop and fix it before the next job. A beam that does not switch off is also a fire risk. Diagnose this symptom ↑
GRBL burns between shapes: laser mode is off
LightBurn: with GRBL 1.1f or later, the likely cause is the controller not being in Laser Mode. The Grbl wiki lists $32=1 as the switch for it.
- Stop the job with the software’s Stop or the machine’s stop control. Do not pull the USB cable to stop a job. If Stop does not work or there is a fire, cut the power with the emergency stop or the machine’s power switch.
- Type $32=1 in the Console and press Enter.
- Burn a small test on scrap and watch it.
- $32 is already 1 and it still burns lines? Check in the Preview that the lines are not shapes in the file. If they are not, stop real work and ask the maker. LightBurn does not cover this case, and a laser that does not switch off is a fire risk.
Related toolsGrbl $$ checkerLightBurn compatibility
Ruida or DSP burns between shapes: suspect the power supply
LightBurn says this most likely means a failing high-voltage power supply: the circuit that switches the laser on and off tends to fail before the part that sets the power.
- Stop using it for real work. A laser that does not switch off during travel is a fire risk, so stay right there if you test it.
- Check the job in Preview to confirm the lines are travel moves, not shapes in the file.
- Contact your laser’s maker for a replacement supply (LightBurn). Do not open it yourself: it is high voltage.
 The math behind the checks
Most of these faults come down to a few simple relations. Energy per millimeter is why corners burn, the power scale is why a laser can look three-quarters dead, and the repeat distance is how a stripe points to a part.
Lines 1, 3 and 6 are basic physics and geometry, written the way we use them. The 250 mm/s² in line 3 is the value in Sculpfun’s guide, used as an example. Line 2 is the arithmetic behind LightBurn’s “roughly a quarter”, and line 4 is LightBurn’s own procedure.
 What is worth buying
Nothing, until a free check points at a part. Then buy that part alone. Swabs and a short shielded cable cost little and are worth having anyway. An air pump is the one real upgrade, and only if you cut a lot. A new laser module is for when the maker’s support agrees, and it may be under warranty. If the machine itself is the limit, compare options on our machine list.
Before relying on any glasses, run the label through our safety glasses checker. For air assist, compare the pump figures on our air assist guide.
FAQ
- Why does my laser engraver make wavy lines?
- Usually something in the motion system is loose, slipping or moving too hard. xTool’s test is to engrave a large square and see whether the X or Y lines wave, then check that axis’s belt tension and rail. LightBurn adds looseness anywhere in the mechanics, a wobbly table and speed near the machine’s limit. Those checks are free, so do them before you buy parts.
- Why is my laser not cutting through anymore?
- If it used to cut the same material with the same settings, look at the lens first: Creality and xTool both list a dirty or damaged lens, and Sculpfun calls it the most common cause of declining performance. Then check focus, air assist and warped material. xTool says power loss from aging is real but cannot be reversed, so treat it as the last explanation, not the first.
- Why is my laser not firing in LightBurn?
- On GRBL, LightBurn says the most common cause of low or no output is commanding a speed the machine cannot reach, because in variable power mode the power rises with the speed. Next check that S-Value Max matches $30, that $32 is 1 and that the layer’s Output is on. Framing and the Fire button do not fire unless you enable them, and Fire is for diode lasers only: never use it on a CO2 laser. On CO2, read the panel for water or lid errors, then OMTech’s mA test.
- What causes ghosting or double lines in laser engraving?
- In fast fills, usually scan lines that do not line up between passes: LightBurn calls this ghosted edges and fixes it with Scanning Offset Adjustment, after ruling out loose belts. On single lines on a CO2 machine, a Thunder Laser help page summary points to the beam clipping the nozzle. If LightBurn’s Preview shows it too, the file contains overlapping shapes.
Sources
- LightBurn: Fire Safety (what to do, extinguisher types)
- LightBurn: Mechanical Issues
- LightBurn: Wobbly Engraving
- LightBurn: Dark & Burned Edges
- LightBurn: Corners Are Too Dark, Too Light, or Missing
- LightBurn: Periodic Defects
- LightBurn: Inconsistent Engraving Tone
- LightBurn: Fuzzy, Blurry, or Overblown Edges
- LightBurn: Scanning Offset Adjustment
- LightBurn: GRBL Low Power or No Output
- LightBurn: Laser Fires During Travel Moves
- LightBurn: Layers Shift When Cutting Multiple Objects
- LightBurn: Engraving Shifted Relative to Cut Lines
- LightBurn: Wrong Start Location
- LightBurn: Incorrect Size
- LightBurn: Slanted or Skewed Results
- LightBurn: Losing Power at Low Speeds
- LightBurn: Preview banding
- LightBurn: Double-Engraved Areas
- LightBurn: Overscanning
- LightBurn: Electrical Problems
- LightBurn: GRBL Communication
- LightBurn: USB Cables
- LightBurn: Connection Troubleshooting
- LightBurn: GRBL Errors
- LightBurn: Device Settings (Fire button, framing)
- LightBurn: Framing (0.25 % starting power)
- LightBurn: Cuts / Layers window (Output)
- xTool: The Engraved Image Is Wavy
- xTool: Connect Air Assist Set to M1 Ultra (AUTO, MAX, defaults)
- xTool: Laser Fails to Cut Through Materials (M1)
- xTool: Laser Won’t Cut Through Materials (blue laser limits) — Read as a search excerpt only.
- xTool: P2 Won’t Cut Through the Material (beam path) — Read as a search excerpt only.
- Comgrow CK-Air-assist manual (focus after fitting a nozzle) — Read as a search excerpt only.
- Thunder Laser: Complete Guide To TITAN Series Laser Alignment
- Sculpfun: Guide to mechanical adjustments and maintenance — Written by a moderator of the official user group, with additions; some speed figures are the author’s own estimates.
- Creality Falcon: General Maintenance Guide
- Creality Falcon: Troubleshooting wiki (error codes)
- Creality Falcon: FAQ (belt tension)
- Full Spectrum Laser: Hobby Series user manual (extinguisher types) — Read as a search excerpt only.
- OMTech: CO2 Laser Trouble Shooting Guide
- Thunder Laser USA: Double Lines & Ghosting When Vectoring Lines — We could read only a summary of that page.
- Thunder Laser: How to laser engrave a photo (scan offset, focus)
- Grbl wiki: Configuration ($110, $120, lost steps)
- Grbl wiki: Laser Mode (M3, M4, $32)
- LightBurn forum: bands traced to a carriage wheel or belt (user report)
Last checked 2026-11-04 · From maker and LightBurn documents, with forum reports marked as such. No machine was tested to make this page, and the pictures on this page are illustrations.