Laser settings for powder-coated tumblers
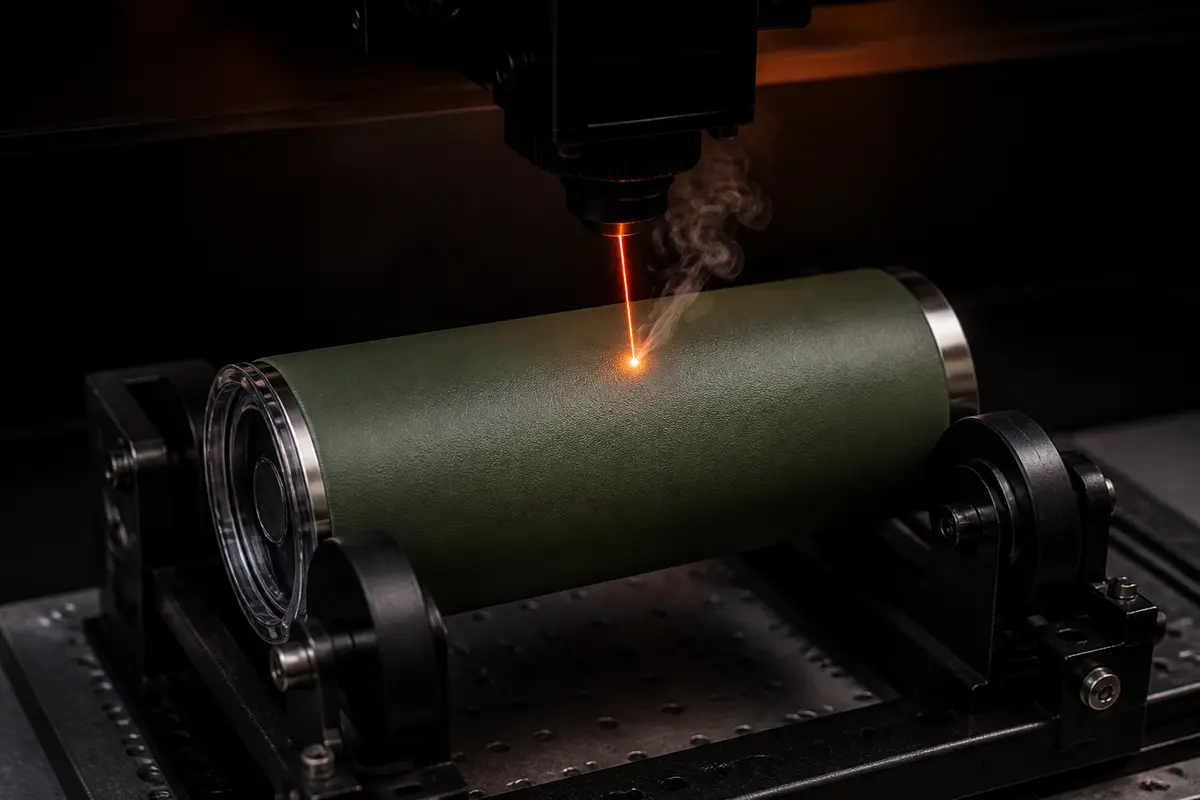
The laser removes the coat, not the steel, and published settings run from 10 % to 100 % power because machines differ. Put on one scale, the middle half of the diode rows is about 1.1–2.7 J/mm². Enter your watts below for a speed to test, then run a grid on a spare cup. We have not engraved a tumbler ourselves: this is sources and math.
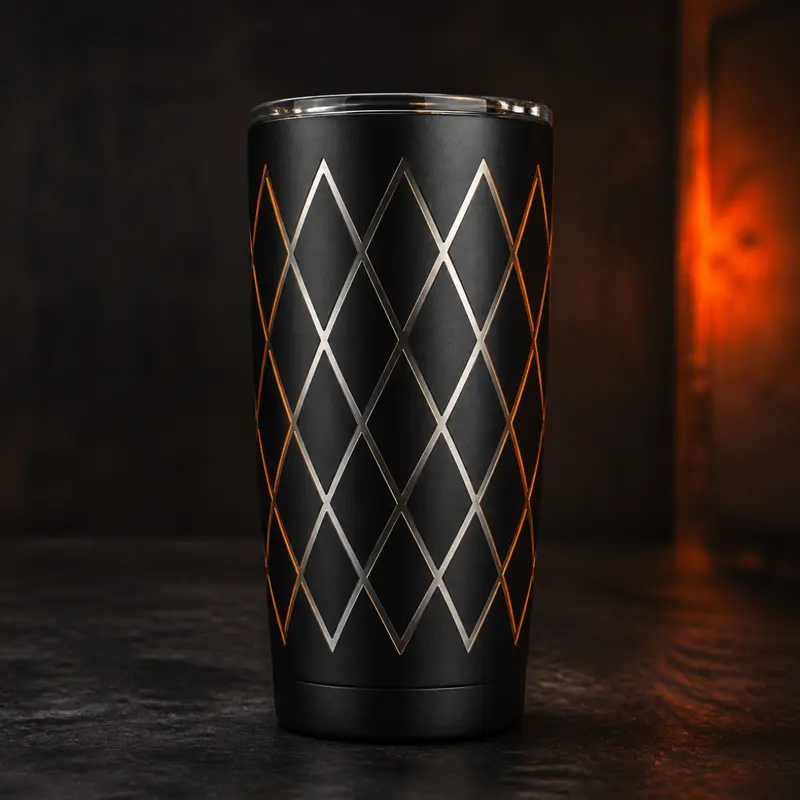
Already have a rotary? Then try a grid on a spare cup and a degreaser wipe before you buy anything else.
 Safety first
- Know what the coat is. Sellers rarely publish it. Glowforge asks you to check that a powder coat contains no PVC (what not to laser cut). Epoxy is on the do-not-cut lists, so skip glitter and epoxy cups. If a seller cannot say what the finish is, do not laser it.
- Do not breathe the smoke. Vent outdoors first: First Day of Home says to make sure the exhaust hose vents outside. GRAPHICS PRO’s CO2 article says engraving powder coat makes smoke and particles that need exhaust or filtration; size yours with the exhaust fan calculator. We found no lab test of the smoke from lasering a cured coat. One TGIC polyester powder data sheet lists “may cause genetic defects” and skin sensitization, but that sheet covers unused powder rather than a cured cup, and your cup’s powder may differ.
- Protect your eyes. Once the coat is gone, polished steel can scatter the beam (STYLECNC). Open-frame lasers need glasses rated for the wavelength: check OD and wavelength here.
- Stay on the outside and away from the base. Do not engrave a surface that touches drinks, or the lip. Stanley says its base seal includes some lead, covered by a stainless layer “making it inaccessible to consumers” (its statement). Even so, we would keep the beam off any cup’s base and never lift a base cap. Those two are our cautions, not a maker’s rule.
- Stay with the machine, as First Day of Home says: do not leave it unattended. Clean degreaser off well, because the cup is for drinking (GRAPHICS PRO 2019 asks for a second cleaning).
 Reported settings on one scale
Every point keeps its source and its tier. A blank seller that also sells xTool, a machine seller’s blog and an owner on a forum are not equal evidence, so they have different marks. Seller rows are starting points, not reported results. Enter your laser to get a band of speeds.
This is the same formula as the power and speed converter. It compares lasers of the same type only. The speed band solves it the other way, using the quartiles of the blank seller’s starting points and the owner reports that worked, without the machine sellers’ blogs: speed = W × % × passes ÷ (J/mm² × line interval).
Your machine
Points are nudged sideways so they do not overlap. Vertical lines show the low and high ends of a row with a range. Most CO2 watts are nameplate tube figures and may not be optical power. Seller rows are starting points, not results.
Tap a point for the original row and the math.
Original row 36 % / 0.08 mm (rest from the post she copied: 1000 mm/min, cross-hatch)
Math 10 W × 36 % × 2 ÷ (16.7 mm/s × 0.08 mm) = 5.4 J/mm²
Heather, 2024-06-01, on several Yeti and Owala colors. She changed the power and the interval and writes “Everything else stayed the same”, so speed and cross-hatch come from Lou’s March 2023 post, and we count the cross-hatch as 2 passes as he does. She reports 35 % did not get through and 38 % showed faint lines.
Source: LightBurn forum, Yeti tumbler etching (2020–2024)Load this into the converter →Load the high end →
Every row on the chart (LPC = lines per cm)
| Machine | Laser | Original row | J/mm² | Tier |
|---|---|---|---|---|
| Infrared | 40 / 400 / 200 LPC / 1 (red light) | 0.040 | Blank seller (also sells xTool) | |
| Diode | 30–50 % / 150–300 mm/s / 300 DPI | 0.21 (0.12–0.39) | Machine seller’s blog | |
| Diode | 50 / 400 mm/s / 300 LPC / 1 | 0.75 | Blank seller (also sells xTool) | |
| Diode | 80 / 400 / 200 LPC / 2 | 0.80 | Blank seller (also sells xTool) | |
| CO2 | 50–70 / 500–1000 mm/s / 200 LPC / 1 | 0.96 (0.60–1.7) | Blank seller (also sells xTool) | |
| Diode | 80 / 315 mm/s / 200 LPC / 1 | 1.0 | Blank seller (also sells xTool) | |
| Diode | 90–100 % / 150 mm/s / 200 LPC / 1 | 1.3 (1.2–1.3) | Owner report · Reported working | |
| Diode | 40 / 200 mm/s / 160 LPC / 1 | 1.3 | Blank seller (also sells xTool) | |
| Diode | 90 / 125 mm/s / 200 LPC / 1 | 1.4 | Blank seller (also sells xTool) | |
| CO2 | 80 / 200–400 mm/s / 200 LPC / 1 | 1.6 (1.2–2.4) | Blank seller (also sells xTool) | |
| CO2 | 25 % / 300 mm/s / 0.073 mm | 1.7 | Owner report · Did not work | |
| CO2 | 35 / 400 mm/s / 200 LPC / 1 | 1.8 | Blank seller (also sells xTool) | |
| Diode | 25 % / 1000 mm/min / 254 LPI / 1 (plus an edge layer) | 1.8 | Owner report · Reported working | |
| Diode | 100 / 100 / 220 LPC / 1 | 2.2 | Blank seller (also sells xTool) | |
| Diode | 100 % / 20 mm/s / 0.159 mm | 3.1 | Owner report · Reported working | |
| CO2 | 60 / 200 / 200 LPC / 1 | 3.3 | Blank seller (also sells xTool) | |
| CO2 | 40–70 / 150–300 mm/s / 200 LPC / 1 | 3.9 (2.1–7.5) | Blank seller (also sells xTool) | |
| Diode | 25 % / 1000 mm/min / 0.09 mm / cross-hatch | 4.0 | Owner report · Reported working | |
| Diode | 36 % / 0.08 mm (rest from the post she copied: 1000 mm/min, cross-hatch) | 5.4 | Owner report · Reported working | |
| CO2 | 40–70 / 150–300 mm/s / 200 LPC / 1 | 6.4 (3.5–12) | Blank seller (also sells xTool) | |
| Diode | 80–100 % / 150–200 mm/min / 300 DPI | 18 (14–24) | Machine seller’s blog | |
| Diode | 70–90 % / 200–300 mm/min / 300 DPI | 23 (17–32) | Machine seller’s blog | |
| Diode | 80 % / 300 mm/min / 0.1 mm / 2 | 32 | Machine seller’s blog |
Rows left off the chart
| Machine | Original row | J/mm | Why not plotted | Tier |
|---|---|---|---|---|
| TwoTrees TTS-55 5.5W Diode | 50 % / 5000 mm/min | 0.033 | No line interval; “coated metal”, not tumblers | Maker table |
| TwoTrees TS3 10W Diode | 50 % / 6000 mm/min | 0.05 | No line interval; “coated metal”, not tumblers | Maker table |
| xTool D1 10W Diode | 100 % / 70 mm/s (LaserBox’s recommended row) | 0.14 | Failed: “inconsistent at best” on Yeti and RTIC. Line interval not known (eilerstg, 2022, post 1) | Owner report |
| xTool D1 10W Diode | 100 % / 33, 20, 10, 5, 2, 1 mm/s | 0.30–10 | Failed: “still looks dark”. He ran these in LaserBox; the .20 interval he mentions was LightBurn’s default, which he could not get working, so the interval is not known (same owner, posts 6 and 10) | Owner report |
| xTool D1 (wattage not stated) Diode | 50–100 mm/min | — | No power, interval or wattage. “Worked really well” on Yeti and far slower than other rows, so we cannot place it (WoodMan, 2022) | Owner report |
| 50W CO2 CO2 | 13 % / about 300 mm/s | 0.022 | No line interval. From his own materials library (jkwilborn, 2022) | Owner report |
| xTool D1 10W + RA2 Diode | 100 % / 70 mm/s | 0.14 | No line interval. Reached metal with air assist off (leasert, 2022) | Owner report |
| Ortur LM Pro 2 10W Diode | 50 % / 3000 mm/min; 75 % / 2100 mm/min | 0.10; 0.21 | No line interval. The slower row is for Stanley and Yeti (JimNM, 2024) | Owner report |
| Snapmaker Artisan 40W Diode | 10 % / 150, “1/2 diode on” | — | No line interval or speed unit, and only half the diodes on, so the 40 W does not apply. “Slow but sure”, many hours per piece | Owner report |
| 10W diode Diode | 60–80 % / 3000–4500 mm/min / 1–2 passes | 0.08–0.16 (per pass) | No line interval | Seller blog |
| 60W CO2 CO2 | 20–35 % / 300–400 mm/s / 1–2 passes | 0.03–0.07 (per pass) | No line interval | Seller blog |
| 30W fiber Fiber | 50–70 % / 600–900 mm/s / 30–60 kHz / 1–2 passes | 0.017–0.035 (per pass) | No line interval | Seller blog |
| JPT 50W Fiber | 50 and 40 / 3000 / 100 (2 layers) | — | No units or interval. It looked great but took 15 minutes a cup; he settled on about 8 minutes (SayCheeze, 2026) | Owner report |
| Epilog Helix 60W CO2 | Speed 50 %, power 80 %, 300 DPI | — | Speed is a percent, so it cannot be converted | Trade magazine |
| 10W / 20W diode Diode | 100 % / 70–100 mm/s / 100–120 LPC | — | One row for two wattages | Project page |
| xTool M1 Ultra 20W Diode | 80 % / 80 mm/s / 120 LPC | — | The page says it contains AI-generated content, so we do not count it as a report | Project page |
Read the spread honestly. Two machine sellers’ blogs sit above every report with complete values, and one of them also has the lowest diode row, so we left both out of the band. One owner does write 50–100 mm/min for Yeti, but with no power or interval we cannot place it. The two most detailed Yeti reports, both cross-hatched, sit above the band, so a thick coat may need more. The line interval matters as well as the energy: owners found that wide intervals leave lines. So the band is where to start a test grid, not a setting to copy. TwoTrees is the only maker table we found, its “coated metal” rows have no interval, and at an assumed 0.1 mm they would be only 0.33–0.50 J/mm².
 What the beam does to the coat
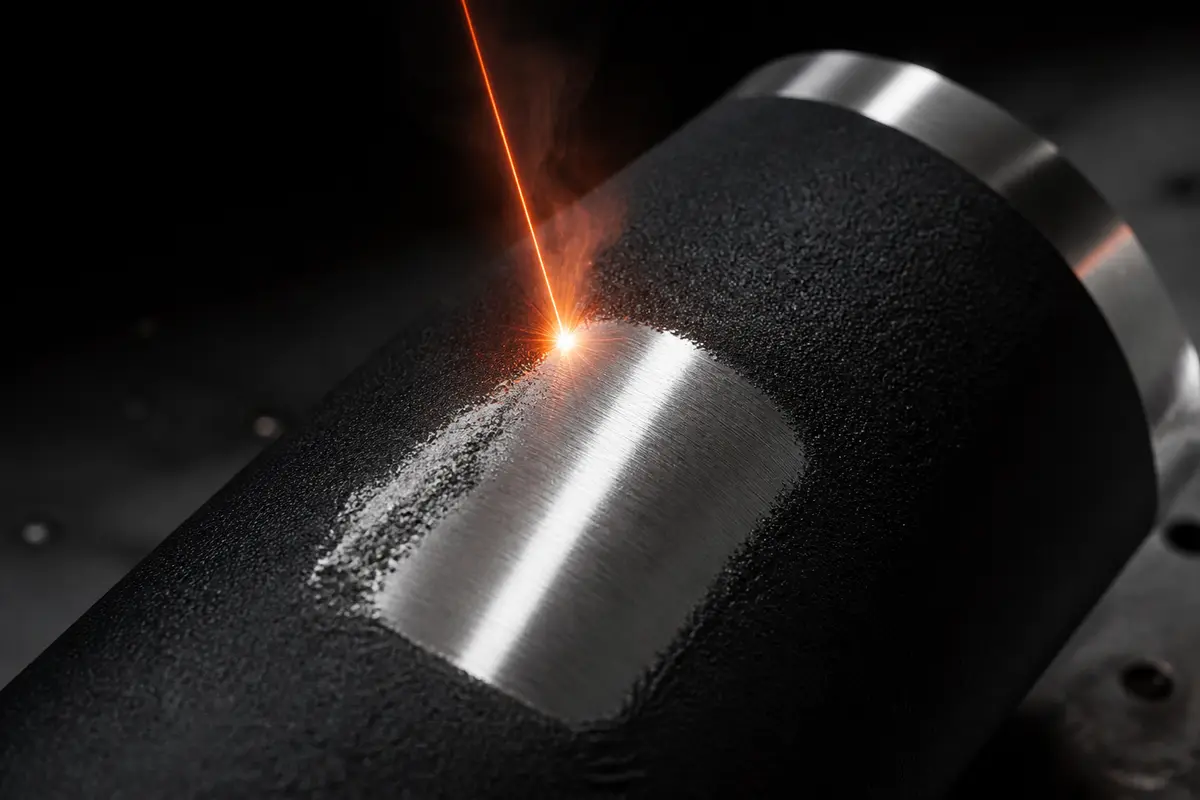
Blue diode, CO2 and fiber can all remove a powder coat (xTool), so a diode can do this job even where sources split on bare steel. GRAPHICS PRO’s advice below comes from a CO2 article, which suggests 400–600 DPI. For bare steel, see laser settings for stainless steel. Move the energy and see the three ways it goes wrong.
A schematic: the sizes and the boundaries are not measured, and the real boundaries differ from cup to cup.
Black is the color most reports use, but even black changes with brand and batch.
Change one thing at a time
- 1
Focus and level. The surface has to stay in focus as the cup turns (GRAPHICS PRO, CO2).
- 2

Change speed first. Then power, in small steps. Dark or rough means try faster.
- 3

Wipe before you judge. A degreaser brightens the steel; for blues and reds add a melamine sponge.
- 4

Save it per cup style. Colors and batches differ, so keep a library.
Air assist reports split. One D1 owner reached metal with it off; another forum poster says too much power without enough air lets the coat melt back. If you do not have it, try the grid first. See our air assist guide.
 Your cup, your rotary, your next step
Pick your setup. The check below only shows the one next step that fits, and if it is nothing to buy it says so. Roller rotaries only care about the roller’s diameter; chucks need the cup’s. A taper drops the top surface out of focus, which the rotary calculator and LightBurn’s Taper Warp deal with.
Your next purchase is a rotary roller
A cup without a handle and a partial design is the easy case for rollers. Check that your laser has room for the cup: rotary height plus cup diameter has to clear the head. If it does not, you need risers too.
Choose a chuck rotary
LightBurn recommends a chuck for full-wrap tumblers because rollers can slip. A handle also gets in the way on rollers as the cup turns. Check that the jaws reach the rim of your cup, because few listings make the maximum diameter clear.
Try your rollers first, and stop if the cup slips
Rollers can slip over a full wrap, and the end of the design then misses the start. LightBurn recommends a chuck for full wraps, or a non-slip wrap or weights on rollers. Try those before you buy anything.
Use the rotary your galvo maker supports
Y-port rollers are made for gantry lasers that have a Y motor to borrow. A galvo needs a rotary its software can drive, such as xTool’s RA2 Pro or RA3 for its own machines. Check the maker’s list first, and do not buy a generic one until you know how it connects. A handle or a full wrap points to a chuck, so ask for one that fits your cup.
Your rollers will fight the handle: ask your galvo maker about a chuck
A handle gets in the way on rollers as the cup turns. A chuck for a galvo has to be one its software can drive, so start from the maker’s list, not from a gantry rotary.
Match the rotary to your CO2 controller
CO2 lasers usually take a rotary through the controller, and forum owners usually report that Ruida boards fix it to the Y axis. Check your connector and voltage with the seller before you buy. Some maker-branded CO2 lasers have their own rotaries, such as AtomStack’s for the Hurricane. A handle or a full wrap points to a chuck, so ask for one that fits your cup.
Your rollers will fight the handle: match a chuck to your controller
A handle gets in the way on rollers as the cup turns. Check the connector and voltage with the seller, and check that the jaws reach the rim of your cup.
You have the hardware: start with test cups
Run a small grid on an out-of-the-way part of a spare cup’s side, then wipe with a degreaser. Do not spend more until a grid tells you what is wrong.
No laser yet: sort the machines first
Blue diode, CO2 and fiber can all remove a powder coat. Below, filter by optical power and whether the maker sells a rotary. If you only want a few cups, a local engraving shop may cost less than a machine.
For bare steel, look at fiber first
xTool calls fiber best suited to bare stainless, and sources split on blue diodes, which may need a marking spray. Or choose a powder-coated cup instead, which a diode or CO2 can handle. If you only want a few cups, a local engraving shop may cost less than a machine.
Bare steel on this laser takes a marking spray
The coat is what this page is about; bare stainless is a different job. xTool says CO2 cannot mark it directly and needs a coating, and sources split on blue diodes. Follow the spray steps on our stainless steel page.
Bare steel on a galvo: start from your machine’s library
The chart on this page is for coats, so it does not apply. With a fiber or infrared source, start from your machine’s own library and test on an uncoated cup. A blue-diode galvo is the marking-spray case on our stainless steel page.
Stop here until you know what the coating is
Epoxy resins are on the do-not-cut lists we track, and STYLECNC says a sublimation polymer melts. If the seller cannot tell you what a paint is, or whether it contains PVC, do not laser it.
The default is a 20 oz example from a retailer listing. Measure yours with calipers. (listing)
Published diameter ranges
- Sculpfun Rotary Roller6–150 mmfits
- TwoTrees TR32–150 mmfits
- xTool RA2 Pro (roller, with risers)3–198 mmfits
- xTool RA2 Pro (chuck)0–100 mmfits
- AtomStack R8 (chuck)0–80 mmtoo big
- TwoTrees TS5 (built in)26–140 mmfits
Selling engraved cups? The laser engraving price calculator prices a job from machine time, hands-on time, materials and margin, then works out the Etsy list price that leaves the same profit after fees.
 Yeti, Stanley and thick coats
Schematic, not measured. Yeti and Stanley publish no laser settings that we could find.
- Yeti: forum posters say the thick coat needs slower speeds or more power than cheap cups, and thickness varies enough to cause banding (LightBurn forum). One owner with settings for a black Yeti had to guess for a white one and was left with a thin film (same forum). The closest thing to a recipe is the cross-hatched D1 Pro 10 W row in the chart. WoodMan writes 50–100 mm/min, with no power or interval (forum).
- Stanley: one owner uses 75 % at 2100 mm/min on a 10 W against 50 % at 3000 mm/min on other cups, with no interval given (forum). Handles need a chuck or a design on the open side.
- Hydro Flask: owners call the coat difficult (forum).
- Rainbow, gold and ion-coated cups: treat these as a different material. GRAPHICS PRO’s CO2 article says they do not need maximum power because settings can discolor or burn off the ion layer. MakerFlo keeps a separate table for its electroplated cups.
 Best laser engraver for tumblers: narrow it down
We cannot name a best machine without testing them. What we can do is show what decides it: optical power sets how long a cup takes, a rotary has to exist for that frame, and CO2 tubes do not always state optical output. Owners get results at 10 W, so more power buys speed rather than the ability to do it.
34 machines
Affiliate links: AtomStack, Sculpfun and TwoTrees names below go to their stores through Awin, and we may earn a commission at no extra cost to you. Other makers’ names are ordinary links.
| Machine | Type | Optical | Maker’s rotary | Time for 50 × 80 mm |
|---|---|---|---|---|
| Atomstack P1 Dual (5W + 1.2W IR) ↗ | Diode | 5 W | Not checked | 19–45 min |
| TwoTrees TTS-55 Pro ↗ | Diode | 5.5 W | TR2 Pro, TR3 | 17–40 min |
| Glowforge Aura | Diode | 6 W | Not checked | 16–37 min |
| xTool F1 | Diode | 10 W | RA2 Pro | 9.5–22 min |
| Ortur Laser Master 3 10W (LU2-10A) | Diode | 10 W | Not checked | 9.5–22 min |
| Creality Falcon A1 10W | Diode | 10 W | Not checked | 9.5–22 min |
| LaserPecker LP4 | Diode | 10 W | Not checked | 9.5–22 min |
| Bambu Lab H2D Laser Module 10W | Diode | 10 W | Not checked | 9.5–22 min |
| Sculpfun E1 Dual (12W + 3W IR) ↗ | Diode | 12 W | Not checked | 7.9–19 min |
| NEJE A40640 module | Diode | 12 W | Not checked | 7.9–19 min |
| xTool F2 | Diode | 15 W | Not checked | 6.3–15 min |
| xTool F1 Ultra | Diode | 20 W | RA2 Pro | 4.8–11 min |
| Sculpfun S30 Pro Max 20W ↗ | Diode | 20 W | Rotary Roller (listed for S30) | 4.8–11 min |
| Creality Falcon A1 Pro 20W (+2W IR) | Diode | 20 W | Not checked | 4.8–11 min |
| LaserPecker LP5 | Diode | 20 W | Not checked | 4.8–11 min |
| Gweike G2 20W fiber | Fiber | 20 W | Not checked | — |
| Longer Ray5 20W | Diode | 20 W nameplate | Not checked | 4.8–11 min |
| Creality Falcon2 22W | Diode | 22 W | Not checked | 4.3–10 min |
| Atomstack A24 Ultra (X24 Ultra in the EU) no longer sold new | Diode | 24 W | Store sells R6, R8, R8 Pro; check your model | 4–9.3 min |
| NEJE Max 4 V2 + E80 module | Diode | 24 W | Not checked | 4–9.3 min |
| Thunder Laser Bolt 30W | CO2 | 30 W nameplate | Not checked | 4.5–10 min |
| Sculpfun S30 Ultra 33W ↗ | Diode | 33 W | Rotary Roller (listed for S30) | 2.9–6.7 min |
| xTool S1 40W | Diode | 40 W | RA2 Pro | 2.4–5.6 min |
| Sculpfun A9 Ultra (40W diode + 20W fiber) ↗ | Diode | 40 W | Not checked | 2.4–5.6 min |
| Creality Falcon2 40W | Diode | 40 W | Not checked | 2.4–5.6 min |
| Bambu Lab H2D Laser Module 40W | Diode | 40 W | Not checked | 2.4–5.6 min |
| Monport 40W CO2 (12 x 8 in, K40 class) | CO2 | 40 W nameplate | Not checked | 3.4–7.8 min |
| Genmitsu L8 40W | Diode | 40 W | Not checked | 2.4–5.6 min |
| Sculpfun S40 Max 48W ↗ | Diode | 44 W | Not checked | 2.2–5.1 min |
| Glowforge Pro (45W CO2) | CO2 | 45 W nameplate | Not checked | 3–7 min |
| OMTech K40+ | CO2 | 45 W nameplate | Not checked | 3–7 min |
| Atomstack A40 Pro V2 ↗ | Diode | 48 W | Store sells R6, R8, R8 Pro; check your model | 2–4.6 min |
| OMTech Polar 50W | CO2 | 50 W nameplate | Not checked | 2.7–6.3 min |
| xTool P2S 55W | CO2 | 55 W | Not checked | 2.5–5.7 min |
| xTool F2 Ultra (dual) | Fiber | 60 W | RA3 | — |
| Atomstack X70 Max (A70 Max) ↗ | Diode | 70 W | Store sells R6, R8, R8 Pro; check your model | 1.4–3.2 min |
| Sculpfun S70 Max 70W ↗ | Diode | 70 W nameplate | Not checked | 1.4–3.2 min |
Times are calculated (energy band × area ÷ (optical W × 80 % power), turnarounds excluded). A machine’s top speed can make it longer. Machine values are published by the maker; we did not test them. “Not checked” in the rotary column does not mean there is none. Check the maker’s list for your model.
Brand pages: AtomStack · Sculpfun · TwoTrees. Which type suits you: diode vs CO2 vs fiber.
FAQ
- What are good laser settings for a powder-coated tumbler?
- No maker publishes one answer. Converted to energy per area, the middle half of the diode starting points and owner reports we found is about 1.1–2.7 J/mm², and CO2 about 1.6–3.8 J/mm² from seller starting points. Yeti reports sit above the diode band. The blank seller MakerFlo lists xTool’s 20 W at 50 %, 400 mm/s and 300 lines/cm, which is 0.75 J/mm². Run a small grid on a spare cup before a real one.
- What xTool settings work for tumblers?
- xTool’s software has no tumbler preset, according to one tutorial. MakerFlo’s starting points for its own blanks: F1 or S1 10 W, 80 %, 400 mm/s, 200 lines/cm, 2 passes; F1 Ultra, S1 20 W or M1 Ultra, 50 %, 400 mm/s, 300 lines/cm, 1 pass; S1 or D1 Pro 40 W, 40 %, 200 mm/s, 160 lines/cm, 1 pass; M1 10 W, 100 %, 100 mm/s, 220 lines/cm, 1 pass.
- Can a 10 W diode laser engrave a Yeti tumbler?
- Owners report that it can. One xTool D1 Pro 10 W owner reports clean results on several Yeti and Owala colors at 36 %, 1000 mm/min, a 0.08 mm line interval and a cross-hatch, with 35 % not getting through. Others in the same forums found Yeti and Stanley need more power or slower speeds than generic cups. It is slower than a stronger machine, and the coat varies by color, so test first.
- Why is my engraved tumbler dark or hazy instead of bright steel?
- A haze is usually coat left behind or residue: try a degreaser wipe, then a second pass if a film remains. Dark edges mean extra energy after the coat is gone, so GRAPHICS PRO’s CO2 article says to change speed before power and suggests 400–600 DPI. Slowing down further does not always help: one D1 owner went from 33 to 1 mm/s and wrote that it “still looks dark”.
Sources
- MakerFlo, Laser Settings for MakerFlo Tumblers & Blanks
- LightBurn forum, Yeti tumbler etching (2020–2024)
- LightBurn forum, Painted tumblers: settings or larger laser? (2022)
- LightBurn forum, Help: streaking on Yeti engraving
- LightBurn forum, Engrave tumblers with 10 watt laser (2024)
- LightBurn forum, HOT pink tumbler help (2026)
- LightBurn forum, Galvo laser settings on tumblers
- Snapmaker forum, My Yeti tumbler settings (2025)
- First Day of Home, How to laser engrave tumblers
- BlazeX, 10W laser engraving guide for Stanley tumblers
- Tyvok, Can you laser engrave painted tumblers?
- STYLECNC, Settings and steps for laser engraving powder-coated tumblers
- GRAPHICS PRO (Sara Thompson, JDS Industries), Getting clean results when laser engraving powder-coated drinkware (2026-04-23)
- GRAPHICS PRO (Braden Todd), Try this: laser engrave a tumbler with logo (2019-04-17)
- Atomm, Wild Brew coffee tumbler project (DIYLife)
- Atomm, Coral reef 2-tone tumbler wrap (czajkaej)
- xTool, Best laser engraver for tumblers
- LightBurn, Full-wrap tumblers
- LightBurn, Taper Warp
- 3D Universe, xTool RA2 Pro listing (diameter ranges; 3–198 mm assumes additional risers)
- DICK’S Sporting Goods, YETI 20 oz Rambler listing (dimensions)
- Sherwin-Williams, POWDURA TGIC polyester powder coating SDS (rev. 2022-12-27)
- FOX 4, Do Stanley cups pose a lead poisoning risk? (Stanley’s statement to FOX Business)
Rotary diameter ranges come from the Sculpfun, TwoTrees and AtomStack product pages (read 2026-11-04; those links are in the shopping boxes above) and a retailer’s listing of xTool’s figures. Last checked 2026-11-04 · Published values and calculations; no tumbler or laser was used to make this page. TwoTrees’ rows are on our TwoTrees page; Glowforge’s PVC warning is sourced on what not to laser cut.